Okay, I’ve just had an incredible a-ha moment, and I want to jump for joy! Course I needed to run back to you and share the joy! (Uh… if you’ve already known this, then clap your hands and pretend you’re hearing it for the first time, okay? 😆 Just kidding!!! 😆 )
So I’ve begun working on a kit that I want to give as a freebie (nudge nudge wink wink!) 😉 When I work on a freebie, I make these little squares and fill them with colors, while I try to decide on a color scheme for the kit…
Well, I got carried away with playing, and before long I had about 80 squares to fill with colors. I had copied and pasted these squares originally (think 80 layers)… and wait! Before you go zzzzz on me, let me tell you what I was wanting to do… I wanted to move up the 1st to the 8th row so I could accommodate one more row of 10 squares below them. Normally, I would select the top layer in the layers palette, hold down shift, then select the last layer on the layers palette. This, as you know, would select all the layers in between as well, so that I could move them as one entire group.
Confession time: a good deal of stuff that I’ve learned about Photoshop has come from playing and experimenting (of course the base of my Photoshop knowledge has always come from my dear friend Jessica)… Anyway, so I was in that playful mood, and I thought: well, what would happen if I just draw a selection around all these squares that I want to “catch” using my move tool?
So I tried it… and guess what? IT WORKED!!! WOOOHOOOOOO!!!!
So actually, if you want to select several items on your workspace / layout, select the Move tool and draw around it (make sure you have the Show Transform Controls checkbox checked so you know what you’re capturing with your move tool)… and when you let go of your mouse button, all that were included in your selection become highlighted on the layers palette and you can move them as a group!
Here’s a screen shot:
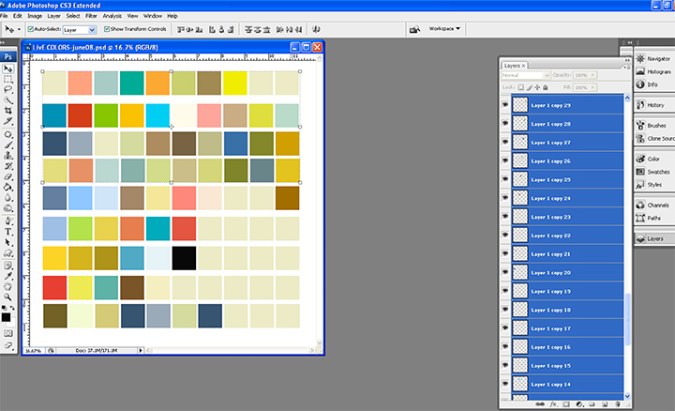
You’ll see that there’s a bounding box around the squares that I selected with the move tool (it appears as you draw around the squares with your mouse, so it’s a great guide that lets you know just which items you’re selecting). And over on the layers palette, you’ll see all the layers are automatically selected.
TOO COOL!!! Hee hee hee.
Well, that’s it for the intermission! Just wanted to share an a-ha moment with you! 😆

Liv just wanted you to know that I have honored you on my blog. You might want to take a look. http://joaniesbalonie.blogspot.com/2008/06/my-first-blog-award.html
LikeLike
Every day that we learn something new is a good day!!! TFS Love ya!
LikeLike
Liv, how clever of you to figure all this out for us. You never cease to amaze me with all your goodness. {{{HUGS}}}
LikeLike
Love ah-ha moments!!! Thanks for sharing!! Can’t wait for you wonderful freebie!
LikeLike
Liv, thank you for the templates and I especialy loved the photo of the Madonna and Child.
LikeLike
Liv- what lens do you shoot with? Macro?
Stunning photography.
I feel like Wayne & Garth:
“I’m not worthy, I’m not worthy!”
LikeLike
Thanks for the little hint, Liv! and I love the “sneak peek” into your process! 🙂
LikeLike