… because it’s good for the soul. And for the proliferation of happy vibes. (After all, who would turn down a chance to frolic in happy?)
And so today, I create: a new blog entry to put an end to my 2-year blogging drought, and a new concoction to spread “happy” in the home. Specifically, my bed, which is my favorite place in our house (which also happens to be my kids’ favorite place to loll around in. Come to think of it, perhaps there’s a connection there, because it always makes me happy to know my kids still think it’s cool to hang around their parents. So you bet I’m milking it for all it’s worth).
So anyway, back to the bed. It gets a lot of workout, with kids lying on it all the time… with their books, with their gadgets, with their zzz’s. And there’s nothing more awesome than lying on a fresh, clean-smelling, cool bed.
So today, I took out my new “toy” that I’ve been going slightly nuts over (read: Young Living Essential Oils)… and made this!
In case you want to try your hand at making your own mattress and pillow refresher, here’s how to do it:
What You’ll Need:
an empty glass bottle with a tin cap
tools for piercing holes into the cap
baking soda
vinegar (for cleaning a recycled bottle)
your choice of essential oils
a bowl to mix it all in
a fork to mix it with
I’ve been looking for a tin shaker can, but since I haven’t been successful searching for that in the right size—and also because I get a thrill out of recycling stuff that would otherwise just be thrown out—I found an old 8-oz bottle that looked like it could hold a cup of baking soda without trouble. Joy!
Now you’re going to want to get that bottle nice and clean as new, with no leftover smells from whatever food it contained, so this is the way to do that:
Recycling Old Bottles into New
Wash the bottle thoroughly. (My glass bottle was clean to begin with, but I wanted it extra clean. Yes, I can be finicky that way, heh).
Pour a tiny bit of vinegar into the bottle (about 2 tablespoons). Twist on the cap, shake for about 3 minutes, and then pour the vinegar out.
Then fill about a third of the bottle with baking soda. Add tap water to the brim, put the cap back on, and shake the bottle again for another 3 minutes (or thereabouts).
Pour the water with baking soda out, rinse thoroughly with water, and enjoy the clean new-bottle scent! Yay!
I needed to make holes in the metal cap, so I brought out my Making Memories kit (isn’t it so cool how those crafting supplies always come in handy?) and hammered in some holes on the metal lid.
Alrighty! With all that done, we’re now ready to make the mattress and pillow refresher (works on carpets and stuffies, too!).
Mixing Magic
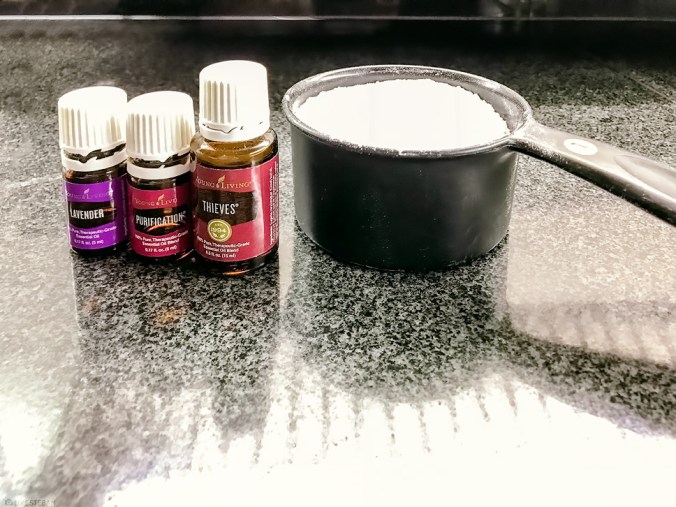
Here’s what I used:
1 cup baking soda
10 drops Purification
5 drops Thieves
5 drops Lavender
Mix together thoroughly so that the oil is evenly absorbed into the baking soda.
(I know, the little yellow globs look kinda alien-like and maybe just a wee bit gross, but they could also look like cookie batter balls with a little imagination, so I went with the second option).
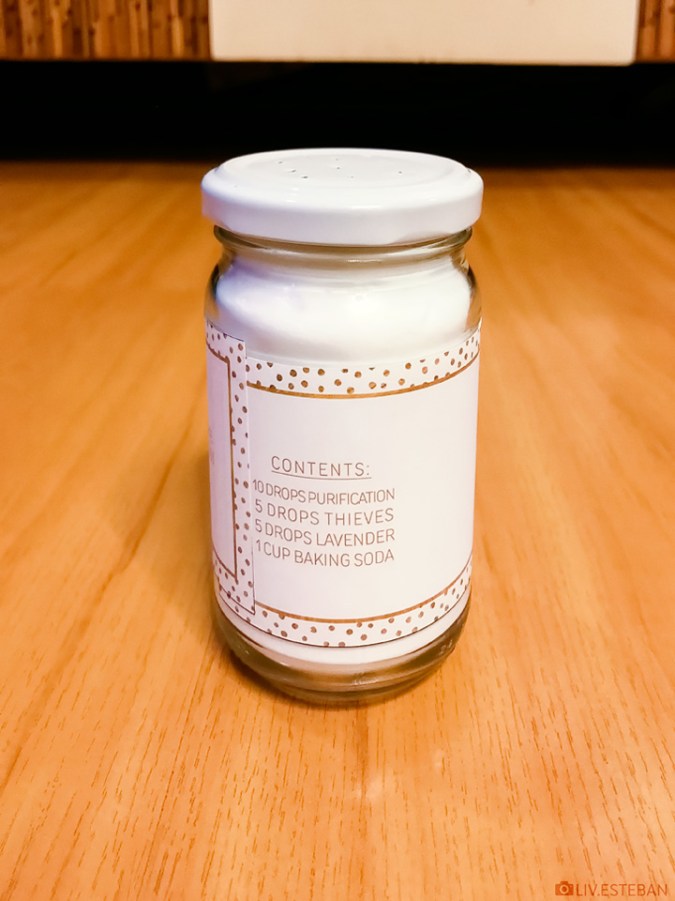
When the oils are thoroughly mixed, scoop the “oiled-up” powder into the bottle. (A cup of baking soda fit perfectly in my 8-oz bottle!).
Let the mixture sit for about half an hour, just to make sure that the oils have time to set nicely with the baking soda grains.
While you wait, work on creating a label for your newest creation!
I like to put the ingredients of what I make on my labels (just because my memory cells don’t always play nice when it comes to details like how many drops of which oil). I also like to put in the date when I created a concoction. There isn’t an expiration date for these things normally, but… it’s just a nice-to-know thing, you know?
For those who’d like to use my ready-made label for their own Mattress and Pillow Refresher concoction, you can click on the download link below to grab the label file. You can print it out on virtually any program that works with .jpeg files. The label measures 8 inches by 2.25 inches, and I’ve included two versions: one with the ingredients listed, and another without the ingredients listed (in case you want to make your own concoction).
Here’s what you get when you download:
And if you want to grab the labels for your own personal use (only), then go ahead and click on the download button right here:
How to use the mattress refresher:
It’s really easy!
Sprinkle the powder over your mattress / pillow / carpet / stuffed toy.
Allow the powder to settle for about 30 minutes. (And enjoy the delicious scent that spreads not only on your stuff but all throughout your room as well).
Vacuum the mattress / pillow / carpet / stuffed toy to get all the powder out.
And you’re done!
When I finished sprinkling the refresher powder liberally all over my mattresses, pillows, carpet and stuffies, my bottle was still practically full and my room smelled heavenly. (To give you an idea of how economical this concoction is, I used it on both a King and a Queen mattress, 16 pillows, 1 carpet, and 2 stuffies). I had used only about a tenth of the powder… and it did the job really well!
Peter Thiel said, “Every time we create something new, we go from zero to one.”
Well, here’s to score one today! Yay!
Update: And yes, we all had a great sleep that night!
It took about 10 minutes to make two plates full. And less than 5 minutes for everything to disappear. (Burp!)
Just like magic.
Magic in the Kitchen!
I still can’t get over it. I don’t think I’ve ever seen food disappear that quickly. Okay, granted my in-laws were over at my place, fondly called “Cafe Estebucks,” for the regular Sunday coffee-and-brunch but still, two whole plates worth gone in 5 minutes is quite a feat, right? 😆
You know how it is in those magic shows, where right before they perform some incredible feat, a deep, carefully-modulated voice warns ominously, “Do not try this at home.” Well, today I’d like to take the opposite path. I dare you, my friends: Do try this at home!
Then let me know if everything disappeared from the plate in record-time as well. Deal? Deal! Awesome. 🙂
What You’ll Need:
French bread (I bought mine, but if it’s your kind of adventure to make your own, you can find a great recipe here)
French salted butter (I used Président Unsalted Butter, but really any butter that you love will do. Or you can skip it altogether if you’re on a diet :|)
Herbs: toasted chopped garlic, chopped basil, a tiny bit of freshly-ground pepper
Prosciutto or Salami Milano
Fresh mozzarella cheese, sliced
How to Perform the Magic Trick:
1. Slice the loaf of French bread. Spread butter on each slice.
The bread and butter of magic
2. Add toasted garlic bits, chopped basil and a dash of pepper.
Sing as you sprinkle herbs because this is delightfully easy!
3. Thinly slice your fresh mozzarella.
Mozzarella, you rock my world! (So does this cheese slicer)
4. Lay the cheese slices on top of your butter and herbs.
This kind of cheesy, I can take. ~lol~
5. Stick everything in the oven (about 5 minutes at 180ºC or 356ºF). Take the slices out when the cheese turns golden-yellow.
Golden Goodness
6. Bring out your prosciutto or salami milano and lay these on top of the now-crunchy bread with soft melted mozza.
Prosciutto ... Salami Milano ... Delizioso!
7. Serve on a plate and watch everything disappear in less than 5 minutes.
Et voila! Magnifique!
Magic!
Who’d have thought something so deliciously simple could be simply delicious? 🙂
Okay, your turn! Try it out and do let me know if you loved it! 🙂 And do have a magical Friday, my friends!
* Credits for stock photos I used to create the image of the magician-boy: Emitra & Gastonmag at sxc.hu
Yes, people, that’s exactly the kind of stuff I’m talking about right now. Literally good stuff. Yummy stuff. Delish stuff. (You get my drift 😆 ).
But before I get to the good stuff, a little back story to explain why I think this stuff is good.
The hubs and I were talking over dinner last night (regular food for him and diet food for me) and I learned from him that studies say that people’s choice of food is a largely influenced by emotional experience. (Did I ever mention how I love being married to a guy who makes a living studying people? There’s always something new to discover each day!). I thought this made a lot of sense: think of two guys in a pizza joint with two girls they’re crazy for. One guy gets the girl; the other guy gets the bill. 😆 That would certainly explain why the guy who got the girl might develop an intense liking for pizza for the rest of his life, while the other guy might not ever touch pizza with a 10-foot pole.
But I mention that food-preference-emotional connection because it leads to this full disclosure: the reason I love stuffed tomatoes is not just because they taste dang good but also because they stir wonderful 14-year-old memories.
Back in 1997, when we only had 2 (of what subsequently grew into 5) boys, the hubs and I went to Paris… but we didn’t have much money back then, so we would content ourselves with eating hotdogs from stands and an occasional meal in a resto. (Hahaha! Yeah, life was pretty REAL back then).
Me in Paris in September '97 - Stuffed with 3 layers of clothing and tomatoes 😉
Well, one evening, we discovered a resto that was tucked in the basement of one of the buildings near the hotel we were staying at, and the French guy was selling… (wait for it)… stuffed tomatoes! Man, I died. They were soooo good. Seriously. I was in stuffed-tomato heaven. And since then, I’ve always loved stuffed tomatoes.
So after experimenting in an attempt to recreate the taste in my kitchen recently, I was pretty thrilled to find out that my kids now share my hankering for stuffed tomatoes as well!
And just in case you’d like to get hooked on this good stuff too, I decided to share the process with you (note: make sure you have good experiences while preparing and eating this, because I wouldn’t want you to end up like the 2nd pizza guy :lol:).
The Essential Goods
What you’ll need to have on hand:
fresh tomatoes
ground meat
herbs and spices, including onion and garlic (chopped)
asparagus (optional, for those who’d like something to add color and more “chews” to the meal)
The Stuffing and the To-Be-Stuffed
Just a few side-comments here about the ingredients:
Use the biggest tomatoes you can find. You’ll want as much space as you can get for stuffing them. Plus (dieters, pay attention!) – there is as much sugar content in a big tomato as there is in a cherry tomato. So in this case, bigger is definitely better.
Make sure the tomatoes are freshly-ripened, with nice taut skins. It can be a total bummer to have to stuff tomatoes that are overripe and have flimsy skins, trust me.
If you’re dieting, you’ll want to consider buying meat at the butcher’s shop and having them grind it in front of you. That way you can make sure that you’re getting real lean beef instead of fat-laden beef or a mixture of pork and beef. If you’re not on a diet, then you really don’t need to care about this, lucky you! 😆
Alright. All set? Now, on to the process!
Stuff It… Stuff It Good!
1. Wash all vegetables thoroughly. Then slice the tomatoes in half.
Tomatoes and their better halves (lol!)
2. With a spoon, core each tomato half. Don’t throw away the stuff that you remove! Just set that aside because, as your momma and mine always said, “waste not, want not!” 😉
Naked Tomatoes (lol!)
3. Season your ground beef liberally with herbs and spices that make your heart sing. Mix well.
I like herbs a lot, so I threw in Italian and Provence herbs, basil leaves, rosemary, toasted garlic bits, sea salt, pepper, and thyme.
Ground Beef with Herbs Galore
4. On a hot pan with a bit of olive oil, sauté freshly-chopped garlic and onions.
Sizzling garlic and onions
It shouldn’t take long till the garlic and onions turn golden.
Golden Perfection
Misto
Tip: Olive oil in spray bottles is convenient and great to cook with, but I prefer to use Extra Virgin Olive Oil which I transfer into this neat little gadget called Misto. You fill the Misto canister halfway with your olive oil, pump the cover a few times, and you have a wonderful, very light coating to fry and sauté with. (And it’s more cost-efficient since you don’t have to buy olive oil in spray bottles, which are usually more expensive than their bottled-liquid counterparts).
5. Remember the tomato insides that we scooped out? Now’s the time to use them! Drop them right on top of your golden garlic and onions.
Three's Company: Garlic, Onions, Tomatoes
Mix them as you continue sautéing. (The smells should make you swoon with joy right about now).
Sautéing and Swooning
6. When the tomatoes, garlic and onions are all mashed and mixed and exuding that wonderful autumn glow 😉 …
Well, hello autumn-colored yummies!
Drop in your ground beef (which you already mixed with all your herbs and spices).
Another one joins the club!
7. Mix the beef well with the tomatoes, onions, and garlic, tossing and turning till the beef is no longer red but not quite brown (more like a light orange color?). Take care that the beef doesn’t overcook. It should be juicy and soft (it’s going to be cooked well enough once it goes into the oven). Trust me, you don’t want well-done beef at this stage.
Keeping it nice, soft and juicy
Once the beef is a nice orange-y color, take the pan off the fire and transfer the beefy goodness to a plate (a hot pan continues to fry even when the flame is gone… but of course you knew that. 🙂 )
8. Take the empty tomato shells and start scooping spoonfuls of the ground beef concoction into them. Pat down to make sure every available space in the tomato shell is filled.
Ooh, we are stuffed!
Tip: Use the spoon to shape the top portion of the ground-beef filling into nice round domes. Just cos they’re cute that way. 😀
9. Gently lay the stuffed tomatoes in your baking trays and sprinkle parmesan cheese on top.
Almost there...
Sprinkle the cheese stingily if you’re on a diet…
A bit o' cheese
… or liberally if you’re not on a diet (lucky you).
You're cheesy, honey.
10. Bake in the oven at about 180ºC (or 356ºF) for about 20 minutes.
If you’d like to add a touch of spring color to your predominantly fall-colored baked and stuffed tomatoes, I highly recommend this:
Steam or lightly boil a few asparagus spears in water sprinkled with herbs. This is super-easy to do and it’s a quick way to get more veggies in your meal!
Greens for the kids
And greens for mom (yeah, that would be me)
11. Serve the baked stuffed tomatoes while hot with a side of herbed asparagus.
Goodness! Stuffed Tomatoes!
Asparagus with a sprinkling of herbs
Want to know the best part of it? This stuff is not just good, it’s healthy too! Yep, we’re talking about no unwanted baggage! Sure, you’ll lick your lips and pat your tummy when you’re done eating this, but you’re definitely not going to end up stuffing yourself with unwanted weight gain in the process, I promise.
PS. If you’re a food lover who happens to be on a diet, you might want to check out the brand-new blog of one of my dear friends (we shared many crazy adventures in college 😉 ). Click on the image below to get to her blog, dietribe (which has awesome photos of food, lemme tell ya).
A Diet Food Blog for Frustrated Foodies
Enjoy! (And if you end up trying this at home, I’d love to know how it turned out for you, so do feel most welcome to come back and hit that little comment box over on the left, right below this. 😉 You are awesome. )
So I admit it. I indulge. Every. Single. Day. And I don’t feel an ounce of guilt about it.
I’m speaking specifically of one thing, of course. Pizza. Guilt-free pizza!
I admit it, I can eat this daily not just because this pizza is totally allowed on my present diet, but even better, it’s super-healthy! I wish I could describe accurately what a great gastronomic delight this is (think of the scene in Ratatouille, where the mouse puts food in his mouth and experiences a whole symphony of bursting colors and lights and flavors. Yeah. That pretty much comes close).
I’ve never considered myself a creature of habit, but eating this is definitely one of the highlights of my every day. 🙂 Here’s how I go about preparing it in my kitchen (a place where I’ve been spending a lot of time recently!).
The Grocery List
Oh yeah. Gotta make sure we have these in stock (or a quick trip to the neighborhood grocery will be in order):
green pepper
tomatoes
portobello mushrooms
onions
spices and herbs
mozzarella cheese (I’ve tried the squares and the fresh; I’d say go for the fresh cos it’s just heavenly)
crackers (for the crust)
All set! And now, to make…
Pizza Delizioso!
1. Chop (finely) the tomatoes, onions, green pepper and portobello mushrooms.
2. Mix well.
3. Add spices and herbs.
Here are the spices and herbs that I usually put into mine:
4. Lay 4 crackers on a tin pan. This base will be your crust.
I use Jacob’s Hi-Cal Original crackers, but you could totally substitute this with other crackers, bread or even dough, I’m sure, if you’re not on a diet anyway. 🙂
5. Lay mozzarella cheese over the crackers.
This infuses the pizza with cheesy goodness, with the added side-benefit of keeping the crackers together.
6. Spoon the veggies that you just chopped onto the cracker-and-cheese crust.
7. Lay more mozzarella cheese on top of the mixture.
I’ve tried mozza cheese strips (above), mozza cheese slices, and home-sliced mozzarella (below)… and they all work well, because all the cheese melts in the end and becomes a mass of delightful goodness!
8. Put the whole thing in the oven and bake for 20 minutes at 180ºC (or until the cheese melts into a golden color).
I love living on these islands in the Pacific, I truly do. I love that we have great beaches (love, even, that I can mention “beaches” in its plural form, and that reaching them does not necessarily involve a plane ride). I love that the two seasons–wet and dry–don’t require drastic wardrobe rotations. I love the cheerful tropical spirit of my people.
But there are two sides to every coin, and on the flip side of everything I love about my country is this: come rainy season, you can be sure the news will carry accounts of dengue fever cases, along with the usual precautionary measures and better-safe-than-sorry procedures to follow if you want to reduce your risk of being counted among the unfortunate bodies who happen to get bitten by the bug (specifically, a huge pest of a mosquito, known to insect-lovers as Aedes Aegypti – though I would think it would’ve been more accurate to have named them Hades Aegypti. ).
When my eldest son, now 19, was about 6 years old, he contracted dengue, which required about a week’s worth of hospitalization and hourly pricks for blood tests. A couple of weeks ago, my hubby got it too.
What Is It, Really?
In case you’re one of the lucky non-tropical dwellers for whom “dengue” is a word that needs some googling (learn more about it HERE and HERE), it’s a mosquito-borne viral disease that’s characterized by sudden high fever (that often goes up and down), severe headaches, exhaustion, and pain behind the eyes, muscles and joints. Sometimes it’s accompanied by a cough and sore throat, a bum stomach, a lack of appetite, and that tell-tale rash (petechiae) that looks like little red flat dots. Sometimes it’s not. See, there are 4 different strains of dengue, and some of them could be quickly fatal and some might not be as serious… but all cases of dengue cause stress and fear because you won’t really know what strain you have until you go through the worst of it.
Three things are most annoying about dengue fever:
One – its symptoms mimic the flu, a cold, a regular stomach bug.
My husband thought he simply had a bad case of the flu till (and this is where I thank my guardian angel for nudging me) on the 3rd day of fever and looking at his weakening state, I suggested that he have a complete blood count (CBC) test. The drop in platelets (that component of the blood that’s responsible for its natural clotting ability) is one of the more certain indications that one has dengue – and on that day, the hubby’s platelet count was 174 (below 250 which was the normal count for his size and age). Eight hours later, in the evening, another CBC was done in the ER of the hospital; his platelet count was down to 134, and he went straight from the ER to his hospital room.
Two – Medicine has advanced now so that you can actually take a dengue test (which requires extracting more blood from you), which can determine whether you’re positive or negative for dengue fever.
That should be good, right? Weeell, here’s the thing: the dengue test is much like a pregnancy test: a positive result means you definitely have dengue fever, but a negative result could very well be a false negative (which roughly translates to: you can’t really breathe too easily because you just *might* have dengue; let’s test again after a day or two). The hubby tested negative when they administered the first test at the ER, but after a week in the hospital the doctor’s diagnosis was positive for dengue.
And three – The thing about dengue fever is there is no medically-sanctioned cure (because it’s viral, there are no antibiotics that can cure it).
So the best you can do is to keep hydrated (first thing the hospital did was to stick an IV into the hubby’s arm), to relieve the symptoms (paracetamol for fever control and hold off on the aspirin as it can contribute to faster hemorrhaging), and to monitor the platelets so that in case it drops way below 100, you can start collecting friends who would be willing to donate platelets in case transfusion is called for. (Yep, they did stick blood-collection needles into the hubby’s battle-weary arm multiple times).
Uh, Didn’t You Say “Cure”?
BUT the title of this blogpost is “That” Dengue Fever Cure, so if there’s no formal medically-sanctioned cure, what in heaven’s name could I be writing about?
Enter the tawa tawa plant (scientific name: Euphorbia Hirta – kinda sounds like Hakuna Matata :P), which is sometimes called gatas gatas in the Visayan areas of my country. Said to be so common around the Philippines, it can be found on rural roadsides and in grassy areas. Loads of friends of mine who either had dengue fever encounters themselves, or close family members with closer calls, had in the past given me first-hand accounts of how effective tawa tawa is as a “cure.” One of the major TV networks even did both a written feature and a live-news feature on it:
So naturally by the 3rd day of the hubby’s hospital confinement and a continually dropping platelet count, I decided it wouldn’t hurt to try out the local herbal remedy recommended by all people from all walks of life this side of the continent. Problem was, I had no previous association with the tawa tawa plant. I had no idea what it looked like. The only information I had stored in my memory was (1) it’s really effective in battling dengue fever and (2) it’s really easy to find, and you’d have the best luck going to Manila Seedling Bank.
The Elusive Search for The Cure
So I googled the map for Manila Seedling Bank and had my driver bring us there. I remember being told that tawa tawa is so widespread (and “wild-spread”) that you didn’t even have to buy it; you could simply ask any gardener at Manila Seedling Bank for a clump of the weeds. I told this to my driver, and as we drove into the compound, he asked the first man he saw (an old man on a bike), “Boss, sa’n makakabili dito ng tawa tawa?” (Where can we buy tawa tawa?) Tsk tsk, lesson number 1: when you say “buy” instead of “get” – now that can put funny ideas in other people’s minds.
The man on the bike said, “Tawa tawa? Naku, walang ganun dito! Sa bundok mo lang yan makikita.” (Tawa tawa? You won’t find any of that here! You’ll only find it growing on the mountain sides). Uh, did I mention I happen to be in a city where the nearest mountainside would be at least an hour and a half away? Sigh. I told my driver to thank the man and drive on, knowing that the blasted plant had to be available in some garden there as my friends had informed me long ago.
Suddenly Mr. Man-on-the-bike came cycling up to the driver’s window and motioned for him to roll down the window. Then with a crooked smile, he offered, “Kailangan niyo ba ng tawa tawa? Kunan ko kayo, sandali lang… magkano…?” (Do you really need tawa tawa? I can get some for you, if you want, real quick… for a fee…). And here’s where I have to confess that I had to stifle the urge to stick my head out the window and inquire of him, “Bakit po, nasa kabilang kanto po ba ang bundok?” (Oh, and is the nearest mountainside just around the corner?). Instead, we said no, thank you, and drove on. I told my driver to park and check the other gardens in the compound and ask for, not offer to buy, the weeds.
After a bit, my driver came back holding a clump of weeds with a triumphant smile on his face… and off we went, back home, where I could begin figuring out how to turn those weeds into the curative juice that everyone was raving about.
Back at home base, it took a while for my driver to park the car and bring the weeds up. Just as I was wondering if he had taken the initiative to turn them into tea himself, he came up and said…
“It seems we were given the wrong plant.”
😯
Whaaaahaaaa?
“This is not tawa tawa,” he said, holding up our bounty from Manila Seedling Bank. “This,” he proudly declared, holding up a tiny measly one-inch stem with 3 leaves on it, “is the real tawa tawa.”
Say that again? Oh holy wow. 🙄
Lesson No.2 – Do not go on a search-for-tawa-tawa adventure without first knowing what the blasted plant looks like.
To make a long story short (as short as the distance between the parked car and our back door), my driver happened to bump into curious neighbors’ drivers, one of whom promptly informed him that the bunch of weeds would do nothing for dengue since they were not tawa tawa weeds. Aaaand (this is where divine intervention steps in) that same driver just happened to have a child who was suffering from dengue and therefore he had a sample of the actual weed needed. Fifty bucks (a little gift of gratitude) later, my driver had even more than a handful of the requisite (correct) weeds and the added information that they actually grew in the gardens of the community we live in. (Nice. Now that’s a literal case of looking over someone else’s fence when you had what you needed right in your own garden).
The only hurdle left: how to actually turn these leaves into tawa tawa tea?
Oh Google, thou art my best friend.
I was thrilled, delighted, and grateful to find numerous step-by-step instructions (here, here, and here), all of which definitely gave me confidence to embark on this potion-making adventure, but I was a bit sad that none of them were pictorial in nature. Forgive me for being a bit dense when it comes to concocting herbal remedies, but I believe I would be excused, being a newbie at brewing medicinal teas from leaves and all that. Wistful and wishful, I imagined how lovely it would have been to have photos accompanying the instructions, just so I could really determine if I was on the right track in this culinary adventure or not. (Or maybe it’s the perennial teacher in me that believes in the power of audio-visual aids to accomplish much deeper learning compared to a straight-out lecture).
All of which really meant that I was a hop, skip and a jump away from concluding that if there isn’t a step-by-step pictorial instruction guide on how to prepare this herbal remedy, then why not create one to help all those who might appreciate not just words but the photos to go with it as well?
And So Here We Are
The instructions, ladies and gentlemen, for how to prepare tawa tawa tea. Words courtesy of compiled references from multiple google searches, photos courtesy of me. For you and whoever else might have use for the knowledge. 🙂
1. Take 5 to 6 whole tawa tawa plants (Since I didn’t know what a “whole plant” looked like, I assumed a clump of the weed = 1 whole plant).
2. Wash thoroughly. (You really want to do this, since the weeds grow by the roadside and pulling them out means you take along with it all that glorious soil).
Tip: The organic vegetable wash liquid from Rustan’s does a great job of making sure that your weeds are really clean. 🙂
3. Cut off the roots. (Yeah, you won’t be needing those).
4. Put the leaves in a boiling pot and add water. (The instructions I found on the web said “Fill a boiling pot with water.” How big would that boiling pot be? About how much water would that be? Am I being too OC about this? 😆 Uh, in case you are wondering the same thing, just do it by feel. If the leaves are sufficiently submerged in water, I’d say you’re on the right track).
5. Boil the tawa tawa on low fire. (Several of the web resources I found instructed “Boil for 1 minute on low fire” or “Boil for 1 minute in a slow, rolling boil.” Huh. In my case, 1 minute did not even get the water to boiling point, and the water certainly wasn’t rolling. So I’d say boil the stuff till you have a slow, rolling boil… whether that takes 1 minute or 5.)
Tip: You’ll know you’ve boiled sufficiently when the water changes color.
6. Let the concoction cool.
7. Throw the leaves and stalks away (yeah, they’re kinda like single-use coupons 😉 ). Pour the tea / juice / colored liquid into a pretty container (presentation always counts! 🙂 ).
8. Et voila! You’ve done it!
Then you let the patient drink the brew in a glass instead of water for an entire day (To me, that would mean a minimum of 4 or 5 glasses of the tea a day, even if one should drink 8-10 glasses of water. I wouldn’t subject anyone to strictly drinking this solely instead of water, but that’s just me).
I tasted it before giving it to the hubs, of course: empathy required it. The hubby hated the taste and said it tasted like Nawasa juice (a joke for bad-tasting water), but I thought it simply tasted like… well, earthy, bad tea. 😆
Epilogue: A day after subjecting the hubs to what he called the Triple T (Tawa Tawa Torture), he was released from the hospital. His platelet count hadn’t gone up to normal levels yet, but they were above levels of concern, and the doctors gave him clearance to complete his recuperation at home.
The hubby thinks that the sickness had simply run its course. Me, I prefer to think that all the prayers of friends and family, hospital care, and the tawa tawa tea – in that order, mind – helped him on the road to recovery. 🙂
So for whatever it’s worth, I hope these pictorial instructions may help anyone in need now or in the future (though I hope even more that no one will ever have need for it, i.e., that everyone will be dengue-risk-free).
PS. Additional research has yielded that dengue fever occurs in other places around the world: “Dengue is prevalent throughout the tropics and subtropics. Outbreaks have occurred recently in the Caribbean, including Puerto Rico, the U.S. Virgin Islands, Cuba, and in Paraguay in South America, and Costa Rica in Central America.”
It’s no secret that I’m a hybrid wannabe. Here’s the thing, though: the biggest reason why I don’t do much hybrid stuff is because I never have enough time (or motivation) to get out a whole bunch of yummy, textural stuff then create stuff with actual scissors and glue and rulers and cutters while making sure that my younger kids don’t accidentally, say, touch the hot glue gun and then clean everything up after. Phew! See how tiring that was just to read? Can you imagine actually doing it? (Hybrid experts, I salute you!) 😀
So when one of my sons takes home a school project that requires parental participation, I sigh and scratch my head, but really, I’m secretly delighted because I have no choice! I have got to get down on my knees and put my hybrid skillz (whatever little I have 😉 ) to work!
This weekend, it was my six-year-old boy’s turn to be my school-project-partner. The task: Create a toy laptop using at least 5 different recycled or old materials.
Nice.
Well then… there was nothing to do but get to work! (And maybe get the camera out, too, so that in case you ever find yourself having to create a toy laptop from recycled materials, you just might find some cool ideas here! 😉 )
STEP 1: Do the caveman thing: hunt and gather!
First order of the day: Collect all the junk you can get your hands on. Never mind if you won’t end up using half of them. It’s just nice to know that you’ve got enough junk to create with (and by using them, you make space for even more junk to collect! Win!)
STEP 2: Have the essentials ready.
Essentials in this particular case would be the project instructions, your hand-drawn diagram of what the finished project might look like, a list of possible materials to use for each part, and yes, that ever-essential super-mug of coffee (or Diet Mt. Dew or hot cocoa, or whatever makes your little hybrid heart happy).
Step 3: Rule it!
Grab the biggest carton that you can find. (I knew there was a good reason to hold on to that box of my laptop stand! 😆 ). Get the metal rulers out (a metal ruler doesn’t get nicks like plastic rulers do, in case your cutter decides to get naughty and cross paths with it). Start trimming off the edges you won’t need.
Step 4: Get a super-cute hybrid helper.
Just because it’s always fun to work with a cutie. 🙂
Step 5: Slot it.
Cut little slots into the sides to create flaps, which will then become the fortified sides of your box.
Step 6: Nip and tuck.
Or, actually, fold and tuck… the sides of the box. Use masking tape to keep the flaps down, in case your carton is thick and refuses to stay down.
This is going to form the body of the laptop. (I’m just sayin’… you know… just in case the box starts to resemble something a pizza would be delivered in… which I think it kinda did for a while. And that’s how I knew we needed to break for a snack 😆 ).
Step 7: Tape and cut.
Oookay. When your tummy is settled and happy, get one side of an old gift box and measure it so that it fits inside your main carton. This will form the base upon which your keyboard will rise. 😉
Tape the sides of the keyboard base. Then cut out 4 strips (measured to fit in the inner part of the other side of your main box). The leftover carton trimmed from the box comes in handy for these little pieces.
Step 8: Got foam?
If your old box came with packing foam inside it, like mine did, do the happy dance! If it didn’t, any semi-stiff material that you can find lying around will do the lift-up job.
Let me explain the how’s and why’s:
Cut up strips of foam and stick them around the sides of the keyboard base. Oh, and the middle part too! This will take care of the extra cushioning you’ll need so that the keyboard base doesn’t lurch inward once eager kid-fingers start “typing” on the keyboard.
Step 9: Bring out the gun.
Turn the keyboard base over, take your glue gun and shoot glue over the sides where the keyboard edges meet with the lower part of the carton.
Step 10: Slice and dice.
Take the leftover carton and cut little strips for the trackpad (scissors come in handy for curving the corners of the trackpad) and then cut the strips into little squares to form the keys.
Stick all of these temporarily with masking tape on any expendable piece of carton, just so you can see how the keys will all line up (plus it makes it much easier to paint them, which is the next step coming up).
Step 11: Go forth and spray.
Step outside into the great green garden, carrying old newspapers to protect the grass… and spray away with old paint left over from various projects.
Step 12: Be Sharp(ie)!
When the paint has dried, take your Sharpie pen and write the letters and symbols of the keys on the little painted cardboard squares.
TIP: It helps to copy from a real laptop! 😀
Step 13: Monitor, monitor.
Print out whatever image you want to use as your monitor image. For our project, I transformed my Facebook page into my son’s using Photoshop. I replaced the profile photo strip with photos of him working on the project. I included an imaginary conversation between his teacher and him, which was a great place to list all the materials he used on the project. 😀
Step 14: Have an apple.
Print out your logo, cut, and paste on the cover of your “laptop.” (I briefly considered using a mango or some other tropical fruit, but Apple won in the end. Hahaha).
Step 15: Watch the wires!
Take a pipe cleaner and bend it a bit. Stick this onto a strip of black leftover carton (folded in half to create both sides). Tape a tiny piece of cut-off pipe cleaner to form the other metal side of the plug. Stick back and front sides of folded carton with glue gun.
Step 16: Check it out!
Check if your laptop looks fine. Do a whoop and a victory battle cry together with your cutie hybrid helper!
Step 17: Fall in love…
… when you see the look of sheer delight and excitement on your little project-partner’s face!
And voila! You’re done! Wooooooot!!!
PS. And if it looks like your little ones aren’t going to sleep early that evening because they’ve “got work to do” on their laptop, don’t say I didn’t warn you! 😉


