Preparations and Promises

What’s your current state of mind right now?

Mine is one of pure excitement! hee!

I have been working on a class that my dear friend Jessica and I will be teaching on our Spraground come September! (What an honor to be teaching with the digi-godess herself!) It’s called Type+writer, and it’s going to be a class on journaling and typography (Read all about it on the Spraground!)

A few weeks ago, I was browsing through the bookstore and picked up this book:

A Broom of One's Own by Nancy Peacock

A Broom of One's Own by Nancy Peacock

A Broom of One’s Own: Words on Writing, Housecleaning & Life by Nancy Peacock

I wish I could say I bought it knowing that I would definitely find something in it that would inspire me for the upcoming course that I would be team-teaching with Jessica, but the truth is, it just called out to me from the bookshelf, and I am all weak-kneed and soft when it comes to resolve in bookstores. (Can never go in and come out without something in my hands).

When we digiscrap and when we edit our photos, we always talk about workflow. You know, what process do you normally go through when you scrap a layout? When you edit your photos? Well… ever thought about your workflow in a bookstore? 😆 I’d love to know!

Here’s how I go from the shelf to the counter in bookstores.

I naturally seek out the areas that interest me. That would be… uh… probably everything. LOL. I can go from cookbooks (even if I don’t cook–there are great photos in there, and besides, hope springs eternal! 😛 ) to interior design (love looking at house designs and room designs–you never know when you’re going to want to redesign your room or your kids’ rooms, right?) to the business books (for some smart reading) to the children’s books (oooh! lots of deliciousness there, and often deep wisdom disguised in very simple phrases too!) to graphic design/photography/photoshop books and writing/writers’ books and general interest books (these last three are where I spend the largest chunk of time browsing and turning pages).

I used to read fiction once upon a time, I’m sure. In fact, it’s all I read from the time I was a kid up to when I was in college. I don’t know when the shift occured, but lately I’ve had no interest in most fiction books (think I got more than my quota early on? 😀 ) and so it’s the nonfiction ones that have me totally absorbed.

But I digress.

We were talking workflow, right? 😀 As I go to these areas of the bookstore, I pick up a book, my attention called initially by the book’s title and subtitle. First thing I do is turn it over and read the blurb at the back. If the blurb fails to catch me, back to the shelf the book goes and I’m off to get my interest hooked elsewhere. But if the blurb passes my initial test, then I open it to the first page and read the first couple of lines. If I fall in love at that point, the book never makes it out of my hands… it glues itself to my hand and walks up to the counter with me, where the salesclerk goes ding-ding-ding, and a few minutes later I’m a happy woman taking home a new paperback or hardbound friend.

Funny how those first few lines matter. Even funnier, I’ve secretly caught my kids applying the same litmus test to the books they buy (Flip to first page, read first lines, good? Good! Sold!)  😀


So anyway, back to Nancy Peacock’s book. Normally, my cousin (who is a published poet in the US and my childhood constant companion and co-book-lover) will send me her latest recommendations about the best writing books and when this happens, I know exactly what to look for on my trips to the bookstore. But this time, last week, I went on a nice, not-looking-for-anything-specific kind of book shopping spree, and this is what I ended up taking home.

I love it. I don’t get much time in a day to read, what with my never-ending and ever-growing list of to-do’s that are screaming for attention, but once in a while you sit down with a book, and it’s just like having a cup of coffee with a new friend whom you’ve just discovered is such a warm, easygoing, interesting, funny person to be with, and you talk and talk and talk, and the one cup of coffee turns to three while the sun sets in the horizon…

Well, this book was that kind of friend to me. 🙂

And wow, guess what? It has inspired me further with my work on the Type+writer course! How much better does it get, huh?

PS. I discovered with no small amount of joy that the author’s favorite books as a child were the Little House on the Prairie series by Laura Ingalls Wilder. That immediately made her my virtual best friend. 😆 Nothing like finding out the books you loved as a child are regarded with as much holy affection by someone else heretofore unknown to you! I always think that’s an awesome thing! (Yeah, I have cheap thrills, hehe) 🙂

So… if you’re in a bookstore, and you like reading a book that absolutely sounds like your best friend telling you stories about her job of cleaning houses while she effortlessly blends in her views about writing which happens to be her other job when she’s not housecleaning, then pick up this book. Not many books compel me to read till the last page without putting it down, but this one has. And it’s not even something that contains incredibly profound, earth-changing truths… it’s just such a joy to read.
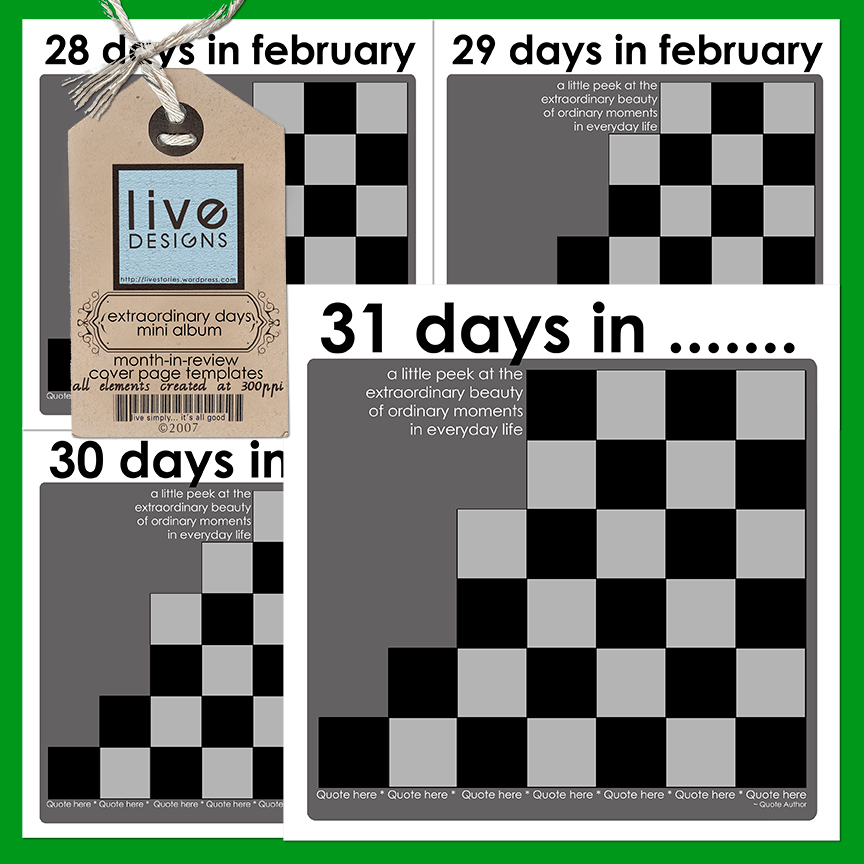
Cover Page Done!

Speaking of having tons of stuff to do… I haven’t made a layout in soooo long, I was getting withdrawal symptoms! Not for lack of desire, no… just a total lack of 24 more hours in each day!

But! I finally finished the cover page of my May Photo A Day Album! Whoopeedoo!

Here’s what I created today:

LivE_May Photo-A-Day Album Cover Page

LivE_May Photo-A-Day Album Cover Page

Credits:

  • LivEdesigns-ExtraordinaryDaysAlbum-CoverPageTemplate
  • Meredith Fenwick – The Day Dreams Collection – Wildest Papers_Paper1
  • Katie Pertiet – Black Black Paper Pack_Paper1
  • Kim Christensen – Spelling101-BlackInkedOverlay, RedStampedOverlay
  • Photos by LivE

Oh! By the way, if you downloaded my multiphoto cover page template, don’t forget to save often because there are 31 photo masks in there, and when you pull in your photos, you don’t want to lose the file in case Photoshop struggles with its memory requirements! 😉 (Or merge the photo layer to the mask layer to save memory, if you’re absolutely sure you’re not going to change it later on). I’m just sayin’… 😀

PS. I kept my photos in their original size and let some details of each photo peep out of the squares, just to add interest to the cover page. I love the idea of guessing what each photo is like, and having to get to the inside pages to find out what each one was, and then maybe flipping back to the cover page to match the full photo with the photo part that shows on the cover. Hee!

Maybe it’s related to my love for the World-National Geographic Magazine for Kids, which I had a subscription for back when I was about 8 years old. I loved flipping over to the back cover (what is it with my fascination for back covers? hahaha!) where there were always about 9 detail photos… and the reader had to guess what they actually were (answers were on the inside part of the front page, upside down… bet it was their way of making sure we didn’t cheat by reading them first before we got to the back detail photos! heehee).

And now, with the cover all done and those detail photos peeping out, I’m all excited to work on the inside pages!

Freebie Promised, Freebie Delivered!

And speaking of inside pages… I finally got these ExtraordinaryDays Album inside page single-photo templates zipped, loaded, and ready for sharing!

And just because I love ya, I decided to include separate png files of the swirl and circle cluster accents that I used on the psd files… just in case you want to use them on your other layouts as well! 😉 Note that glass accents are the most difficult to add drop shadows to, because … uh… because glass behaves in a funny way, right? (Try putting a glass of something in the sun and you’ll see what I mean 😀 ).

So, because I really believe in keeping things as simple as possible, I decided to give you the glass accents with drop shadows applied already to them. If you wish to apply your own shadows further, you can… but note that this will make the black glass take on a darker, less transparent shade (and if that’s the look you’re going for, then it’s all good! 😀 )

So here’s what I’m sharing with you today!

LivEdesigns ExtraordinaryDays Album Inside Page Templates & Accents

LivEdesigns ExtraordinaryDays Album Inside Page Templates & Accents

Click here to get the Extraordinary Days Album Inside Page Templates and Glass Accents.

THANK YOU SO MUCH for the love you leave on my blog! (I love the fuzzies you leave on my 4shared account, but the love you leave on my blog will last forever, whereas the fuzzies on 4shared disappear once I unload the files :/ )

Don’t forget to link me up when you create with these as I’d really love to see what you create! 🙂

And… that’s all for now, folks! Have a happy day, my sweeties!

Five Firsts!

What is it about first times that make them so special and memorable?

The first steps a baby takes has parents stumbling in their rush to reach for the camera to record the monumental event. The first grandchild. The first day of school (shiny shoes, new pencils, new bag… whee! nirvana for me and my siblings when we were kids!). The first visit from the tooth fairy. The first Christmas.

Then there’s the unforgettable first love (in nursery? mine was… uh, must I incriminate myself and let the world know that I was a late bloomer? heehee! I had my first crush in  Grade 2–and I think I was mesmerized by the thick beard around his face more than anything else. 😆 )

If you stopped right now and asked yourself, what are the latest first’s you’ve experienced lately, would you be able to list them down and answer right away? Or would you have to pause as you traipse down memory lane, brows knotted in deep thought, as you try to recall the events of the last five months?

I was fascinated by the thought of First Anything today… and here are my five of my latest first’s!!! (Okay, you can accuse me of shameless–or shameful?–tooting, but hey, as we chanted in Chicago: we are worth it, right? 😉 )

First Time to Be Featured in a Graphic Design Blog!

What a thrill! What a pleasant surprise! What a COOL thing to discover! This little humble blog porch of mine was featured in two graphic design blogs last June 14th! The post that was featured was Photo Phun!

I almost fell off my chair in utter delight when I saw this:

Graphic Identity Blog Link

Graphic Identity Blog Link

And this!
Estetica Design Forum Blog Link

Estetica Design Forum Blog Link

A huge, happy THANK YOU to Estetica Design Forum and Graphic Identity!

First Time to Visit Chicago & New York

Totally awesome places! Loved The Bean at Chicago, eating deep dish pizza at Giordanos, walking and walking and walking around The Loop, dinner at Fultons by the River, and taking the Riverboat tour!

Chicago - Walking Along The Loop

Chicago - Walking Along The Loop

Chicago Buildings from the Riverboat

Chicago Buildings from the Riverboat

View from the Riverboat

View from the Riverboat

New York Times Square - the view from our hotel room window

New York Times Square - the view from our hotel room window

The Ubiquitous NYC Taxis

The Ubiquitous NYC Taxis

More photos coming in the future… there are just thousands and thousands of them! 😀

First Time to Hug My Dearest Spraground Sistahs!

In person! What a thrill! This has got to be one of the most memorable and special experiences in my entire life! What a connection!
One of my favorite photos of Jes and me - taken by Susan

One of my favorite photos of Jes and me - taken by Susan

Love this photo taken by Jes!

Love this photo taken by Jes!

Some of my absolute favorite people in the world! - Photo taken by Lisa

Some of my absolute favorite people in the world! - Photo taken by Lisa

The Spraground Sistahs Take Over Windy City!

The Spraground Sistahs Take Over Windy City!

The only downside to this is that I end up missing them so much more now, and wish that the oceans were less wide and the lands were more spread out so that we could literally walk over to each other’s houses and give each other hugs in person anyday!

First Time to Do an Actual Hybrid Project

Ah… this one I was totally not sure about… but with a little modge podge, a little advice from my dear friend Lisa J (who won’t admit to being a creative crafter, but she is!), a little help from a carpenter friend who made the wooden box for me according to my specs, and a little help from my two sons who fixed the goodies/doggies inside it when it was done, I was able to play around with hybrid (yeah, so it was an adventure I’d been longing to do!) *and* use my heretofore unused-but-hoarded paper scrapping materials (and thus feel less guilty about the hoarding, haha) *and* come up with a birthday gift for my MIL who loves doggies!
This is what I started out with: a wooden shelf with partitions, made according to my specs, with 4 rows of 6 little box-houses. The entire thing was about 12in x 24in.
D )

Step 1 - Begin with a wooden shelf painted in colors you love (I didn't love the color on this one, hence the decision to decoupage the entire thing! 😀 )

Step 2 - Modge-podge (yes, I've turned it into a verb!) patterned paper onto the sides of the shelf.

Step 2 - Modge-podge (yes, I've turned it into a verb!) patterned paper onto the sides of the shelf.

Step 3 - Cut patterned paper into vertical strips and modge-podge them onto vertical divisions of the shelf.

Step 3 - Cut patterned paper into vertical strips and modge-podge them onto vertical divisions of the shelf.

Step 4 - Do the same for the horizontal divisions of the shelf.

Step 4 - Do the same for the horizontal divisions of the shelf.

Step 5 - Cover top of shelf with patterned paper. Wash modge-podge off your hands in between applications in case you happen to be munching on chips. ;)

Step 5 - Cover top of shelf with patterned paper. Wash modge-podge off your hands in between applications in case you happen to be munching on chips. 😉

)

Step 6 - Cover the back of the shelf with patterned paper to complete the shelf's clothing. 🙂

Step 7 - Attach eyelets to chipboard flowers using the ever-reliable, handy-dandy Cropadile!

Step 7 - Attach eyelets to chipboard flowers using the ever-reliable, handy-dandy Cropadile!

Step 8 - Attach other embellishments to the top of the shelf to complete the look.

Step 8 - Attach other embellishments to the top of the shelf to complete the look.

Step 9 - Make it a family project (and allow yourself to take a break!) - Let kids take care of arranging the doggies on the shelf.

Step 9 - Make it a family project (and allow yourself to take a break!) - Let kids take care of arranging the doggies on the shelf.

Step 10 - Voila! Stand back and clap your hands as you survey your first hybrid project... because you've finally put some of your paperscrappin' hoard of goodies to use!

Step 10 - Voila! Stand back and clap your hands as you survey your first hybrid project... because you've finally put some of your paperscrappin' hoard of goodies to use!

Hee! This was fun while I did it… I’ve always loved crafts, and nothing beats the doubled fun of working on projects with kids… but… what can I say? I love digi first and always. 😆

And now… to continue the alliteration started with the Five First’s… let’s talk about First FREEBIES!

And yes, I know, I’ve been giving out freebies for almost as long as this blog porch came into existence, but  it’s my…

First Time to Come Up with an Album Template Mini Freebie!

Woohoo! I am so happy about this, and even happier to share these with you!


Here’s how this all ties in with my first First up there and my fifth First down here. Remember the Photo Phun post (the one featured in the graphic design blogs up there)? Well, that all came about because we at the Spraground were having the most fun adventure, led by the awesome Jessica, of coming up with a photo a day for the month of May! And since I’d been wanting to print out those photos and put them in an album instead of keeping them hidden inside a folder in my compy, I decided to create an album for them.


When I make layouts, more often than not, I sketch in my trusty little graph notebook (Moleskine graph notebooks ROCK!) how I want the layout to look. And then I translate that pencil sketch onto my computer with Photoshop! So I made a cover page sketch for the album and a few inside page sketches.


While I was working on moving that sketch onto my compy via Photoshop, I decided… hey, since I’m making a multi-photo page for the month of May (which has 31 days and therefore 31 places for photos), why don’t I make a similar template for 30 days? That way, if any of us decides to resume the Photo A Day adventure on any other month, we’d have a ready template for those months with less than 31 days?


And then, since my brain is known to dive into this sort of territorial waters–haha, I decided to go full-speed ahead and include February as well (both 29 and 28 days), to complete the entire range of possibilities!


So here are the different cover pages I made for my Photo A Day Album… and I’m sharing them with you, as always!


LivEdesigns Extraordinary Days Cover Page Templates

When you use these templates, just type in the month that applies to your album where the ellipses are (I’ve left the text editable; feel free to change it!). I’ve also included a phrase to show where the journaling can fit in… and below there is an area for you to include a quote if you wish.


These templates come to you in .psd format. Use clipping masks to get your photos and digi paper onto the mats and photo masks. 🙂


Note: If you’re into making regular layout pages that feature months-in-review, I figure these should come in real handy as well!


Click here to get the mini album cover page templates.


ETA: Link removed. See post of September 24 for new link.


Now, I can’t just give you the cover and not give you the inside pages as well, right? 😉


Sooo… I created 3 inside page templates, each one of which is a single-photo template. There are two different portrait-oriented / vertical  photo templates for the left and the right side of the album, depending on how your pages turn out; and there’s a single-photo template as well for landscape-oriented / horizontal photos.


I only made three templates because that’s all that I needed… and by using each one of them within the album, you can get an album that’s both pulled-together and unified!


Oh, and there’s a bonus inside as well! I created two black glass accents for use on the album pages… one is a black glass swirl and the other is a black glass circle cluster. I’m including them inside the .psd template files, but they are created on transparent backgrounds, so if you wish to use them in your other layouts as separate elements, feel absolutely free to do so (just read my TOU and don’t forget the credits! 😉 ).


I’m presently working on zipping up the inside page templates, but since it feels like forever since I last released a freebie (and I’m uber-excited to share these with you 😀 ) I decided to release these cover pages now and come back and post the inside page templates in a separate download, once I’m done zipping them up! So don’t forget to check back for them!


I’m going to be working on my Photo A Day album in the next 24 hours (after I get the inside pages zipped up and on their way to you!), and when I’ve got my layouts done, I’ll upload them to share with you. If you use these and create pages or even an album of your own, do link me up! I’d looove to see how you use these and I would love even more the chance to marvel at the marvelous creations you come up with!


Alrighty then! Back to the worktable! 🙂

MoMA Art

Okay, so maybe when you hear MoMA, you think of the Museum of Modern Art in New York. And that’s a fabulous place to visit, and it’s what I also think of when I hear MoMA.

That’s not what you’re about to see here. 😛

This is actually my version of MoMA Art (Mom-Approved Art). heehee. Tell me, has there ever been a mom who didn’t think her kids’ artwork was the GREATEST? I’m no exception. 😀

Here’s what my son J gave me the other night, drawn while he was in front of the TV set watching Angry Beavers (according to Wikipedia, it’s an Emmy-nominated TV show… all I know is that it comes out on Nickelodeon and I’ve heard some great songs–cartoon-wise–from this cartoon show!)

J's Angry Beavers

J's Angry Beavers

And here’s what they REALLY look like on TV:

The Real Angry Beavers

The Real Angry Beavers

I don’t know about you, but I thought my son’s recreation of these characters as pretty dang cute! Feel free to disagree with me… but in my Mom Book, this is a real winner for me! hahaha!

Catch you later today! 🙂

Ready? Set? Action!

Ha. Totally corny title, I apologize. 😛

But am totally thrilled… just did my first action, which is really really simple, but which arose out of the necessity of uploading loads of photos from our Chicago Spraguefest onto the gallery which Jessica so kindly created for us on our Spraground! I just finished sorting through almost a hundred plus photos from the *first* day of our Spraguefest, and I was scratching my head, thinking, oh wow… if I have to resize all of these to websized files so I can upload them to the gallery, how long is that going to take me? There must be an easier way to do this!

Yep that’s me. Ever since I can remember, I would always think in terms of “What’s the most efficient way of doing this or that?” I guess it’s the latent problem solver in me (just wish this skill extended to a lot of real-life problems, haha!)

So, I did a bit of googling here and there, a bit of fiddling around here and there, and came up with 2 actions!

The first is called Batch Resize for Web, and what it does is reduce the width of your image to 600 pixels (the height automatically adjusts proportionally based on your original image’s height). It brings down resolution from 300ppi or higher to 72ppi, and it interpolates using bicubic sharper.

The second is called Batch Resize Original2Web, and what it does is just bring down the resolution to 72ppi and interpolates using bicubic sharper, but does not change the pixel size of your photo to a given measure. This would necessarily result in a larger physical photo than the first action, but still give you something that can be uploaded to galleries or emails where you are not constrained by small size limits.

I’ve created the action using CS3, so I’m sorry but I have no idea if it will work in Elements. :/

I created the action for doing batch resizing, but it can also be used to resize individual images (photos, layouts, etc) one at a time.

To use it to resize individual images, just load the action in your action palette, open your original image, and click on the Play button.

To use it to resize batch photos, just load the action in your action palette, and then:

1. Start by creating two folders anywhere on your compy. Name one folder “Originals” and the other folder “Resized” (or whatever you want to call it, as long as you know which folder the originals are in and which folder you want the resized photos to go into). Dump all the images you want to resize in the Originals Folder. You can also resize them directly from the existing folder that your photos are in, but in case you have chosen only a specific set of files to resize from a folder that contains more images, the Originals folder would be a better option.

2. Go to File > Automate > Batch.

3. In the Batch dialog box, under Play – locate the name of the action in the actions dropdown list.

4. In the Source area, select Folder in the dropdown list and select Choose. Navigate to the place on your hard drive where you placed the Originals folder. Don’t forget to check the two last boxes that allow you to suppress warnings and options.

5. In the Destination area, select Folder in the dropdown list and select Choose (exactly like the previous step). Navigate to the Resized folder that you just created.

6. In the File Naming area, you can input the names of your files, if you wish to change their filenames. What I did was to choose “2-Digit Serial Number” and keep the extension specified (in my case, jpeg).

7. Don’t forget to check all the boxes in the Compatibility area so that everyone, regardless of what platform they’re using, can view the photos.

8. Click OK.

Once you click OK, Photoshop will open each photo you’ve placed in the Originals folder, resize it, and save it to the Resized folder. Sometimes you might get prompts that ask you to select save settings (mine did for some); when this happens, just click OK and the process of saving the image will continue with the next photos in the batch.

I learned how to do this from Wired How To Wiki, a pretty cool place I just discovered. 🙂

So… for my Chicago Spragsistahs and for all of you, my friends, who’ve come to visit and sit with me on my blog porch, here’s my action set. Hope you find some use for it! 🙂 (And thanks so much in advance for the love you leave on my blog! 🙂 )

ETA: If the 4shared link doesn’t work above (as I think some gremlins have been playing with the link), here’s another place where you can get my action set too.

Oh, and here’s a photo of that lovely time we had… more coming soon!


Flatties and Realies by the River

Flatties and Realies by the River

Alrighty! Back to the barracks to do more work! See you soon, my sweeties! 😀

BACK HOME! Yay!

Less than 24 hours with my feet firmly planted on homeground (okay, so maybe they’re firmly planted behind my butt as I sit on my chair, legs up, in front of my compy), and 3 hours of sleep after, and I’m so glad to be back home. I love traveling, but I love coming home more. 🙂

Chicago was awesome. If you go bloghopping, beginning with the Main Girlie’s blog (Read: Jessica, that Super-Awesome MegaWoman friend of mine) and going down the trail of blogs of my friends Shell, Veevs, Joan, Jana, Tori, Kari, Deb, Laurie, Jeanne, Susan, Amy, Lisa, Tall Lisa, and Janet who joined us for dinner on Friday evening, you should be pretty up to date with the am-AAA-zing weekend we all had last 27-29 June. We blew away the Windy City with all our cameras (the guy on the River cruise we took said “Wowza! I’ve never before seen such a group of women with such awesome cameras!” hehe. You tell em, dude! 😛 ), our laughter, our craziness, and our overflowing love for each other.

Lots of photos coming soon. As of last upload count, I had 2000 photos, so I will have to work on sorting through all of them and narrowing the count (lest this become a photo blog, lol!). Gotta love 8GB camera cards, huh? 🙂 Okay, so maybe those photos included NYC as well, but Chicago alone accounted for about 1500 of the total photo count… (Chicago GFs, are you ready to download these? ROFL!)

While sitting in the plane flying home, thousands of feet above sea level in the middle of dawn and morning, I grabbed a pen and paper and wrote this by hand, fully wishing I had a laptop instead, and fully intending to post it on my blog as soon as I arrived home. So here it is; bear with me:

How Gremlins Can Be a Good Thing

It’s a 28-hour-flight, more or less (or at least it feels like it), and we’re crossing time zones and three cities with layovers and de-planing and re-planing (I’m inventing words and I’m claiming jetlag insanity to excuse it 😛 ). Aaaand it just so happens that my little 2-year-old boy decides that THIS, the longest leg of the flight, from Detroit, USA to Nagoya, Japan, is the perfect opportunity to grab a nightmare out of nowhere and have a major meltdown in a plane filled to the brim with tired passengers trying desperately to get some shut-eye between cities.

So picture this: a large jet with every seat occupied by a tired, heavy-lidded passenger trying to find the most comfy sleeping position possible. Lights dimmed. Low hum of plane engines the perfect white noise to lull everyone to sleep. Perfect. And then…

NYEEEEAAAAAHHHHHHHHHAAAAAHHHHH!!!!!

A piercing cry, shrill, high-pitched, breaks through the sleepy lull, like a mad banshee in a forest. Heaven help me, the sound is emanating from this little 2-year-old boy beside me, the one who just a few minutes ago was like a sleeping angel in my arms. I hug him, I hold him, I shush him. But the kicking, screaming, and blind punching continue. This nightmare my little one has had is so real, he can’t even wake up enough to realize that it’s just a dream (and my ego suffers a dip as I realize my most soothing motherly voice does nothing in the comfort department, lol!) The binky I offer gets hurled by angry little fists at least 2 rows down, to be fished by some elderly gentleman from the plane’s carpeted floor (thank you, my eyes tell him with extreme gratitude and apology combined).

“J touched me!!! He touched me!!!” my little one screams, pointing to his arm, punching the air, totally annoyed that his older brother “touched” him while he was sleeping. Of course this little older brother was seated a row ahead of him and two seats to the left… and unless this boy had morphed into the PlasticMan while I was asleep, there was absolutely no way that he could’ve touched this other sweetie of mine.

But even if I whisper “It was just a dream, honey” and “J is fast asleep; he couldn’t have touched you, dear,” my little one is unconvinced and is just a total mess of tears and wailing.

After about 24 hours (okay, in reality, it was less than an hour, but it certainly felt like 24), my dear hubby comes to the rescue, hobbling over legs from his seat 2 rows ahead of us where he had our 4-year-old sleeping the flight away curled like a nice little baby lamb on the seat next to his (Why, oh, why could we not have shifted kiddo assignments for this particular flight, I ask myself wistfully).

Three minutes after hubby squats beside our seats, which is now a tangled mess of airline pillows and blankets, my little one decides to quiet down. Still refusing to be held by anyone, he tucks his little binky’ed chin into his chest and faces the backrest of the chair to whimper and sniffle himself back to sleep. I watch with bated breath, fearful that any movement might rouse the gremlin that got into my kid and make him do a screaming banshee act again.

And then. Like the first rays of dawn beaking through the dark clouds of a long-winded nightmare, the little one reaches for me, bleary-eyed, with outstretched arms, and softly whispers…

“Mama.”

And I take that little monster of mine into the curve of my circled arms, rock him back and forth a bit, and when I am sure his breathing is relaxed and back to its peaceful cadence, I let out a long sigh of relief and more than a couple of teardrops of exhaustion.

Now what could be good about this major meltdown? (I am thinking of my friend Jes and her equally horrifying experience with her kids’ meltdown recently at a friend’s place. And I’m thinking, heck, this one beat theirs).

Count your blessings they say. Behind every dark cloud is a silver lining.

Here’s the silver lining of this one: For one thing, I realize yet again that as parents you and I may want to control our children and their actions and reactions as much as we can (especially when that action causes an infinite reaction of shuffling and twisting and turning of disturbed passengers in their seats), and yet despite all our best efforts, we still aren’t able to do a single thing about it. Not because we lack anything, not because we did not foresee this, not because we are unprepared, but only because… sometimes, that’s just the way things are.

Acceptance.

This has taught me to accept with peace and calmness that certain things are just beyond one’s control.

And since we mentioned peace… this brings us to the second silver lining: This experience beats any eight-week class on Lamaze breathing exercises. This is the mother load of training in Inner Peace Maintenance. I’ve heard it said: Never try to put out a fire with a blaze. This meltdown certainly had enough heat of its own. So a couple of deep breaths and inner calming mechanisms later, I can now claim that I am a Master of the Zen of Deep Breathing.

Third silver lining: This drives home the truth in that old adage – This, too, shall pass. Good moments, freaky ones… they all pass. They’re all temporary, fleeting, here today gone tomorrow, popping like fragile bubbles of time. What a great reminder of how, truly, we are simply travelers in this world, passing through temporarily till we get to our final destination with peace, wits, and ability to appreciate all things intact.

Ah.

The profundity that lies behind Major Meltdowns. Where would we be without it?

Other Various Lessons I Learned from 10 Days Away from Home:

1. You can get *really* BIG hair in the Big Apple if you skip that crucial step of applying conditioner after you shampoo your hair at night. So make sure you either use conditioner at night or get up really early before the rest of your family does.

2. You can walk around and around in circles, map in hand, to get to Madame Tussaud’s in New York, and then lose the map at the 4-D show at M. Tussaud’s yet walk back to your hotel in four minutes flat, in a straight line. Nope, no circles, no map. Less time. Go figure.

3. You can meet, hug, stay up late, and walk the streets of Chicago with friends you’ve only actually held in your arms a matter of seconds ago in real life… and feel like you’ve known them all your life, and feel like you can talk and talk and talk forever, and miss them like crazy when the three days are over because these are people you love and who love you back… and know that this is phenomenal, that this is a gift, that this is something that doesn’t happen to many in even one lifetime. And you know in your heart. THIS is what connection is. Not as it is defined in any dictionary, but as it is etched forever in the grooves of your heart.

To all my Spragsistahs that I hugged in real life in Chicago, and to my most awesome, amazing friend Jes… THANK YOU. This is an experience I will always treasure in my heart. And remember, there are no goodbyes… only Till Next Spraguefest, right? 😉

And now, on to the growing list of to-do’s that are calling my name…