Wonderful Wednesday, It Is!

I think Yoda would agree. 😆

One-Buck Wednesday

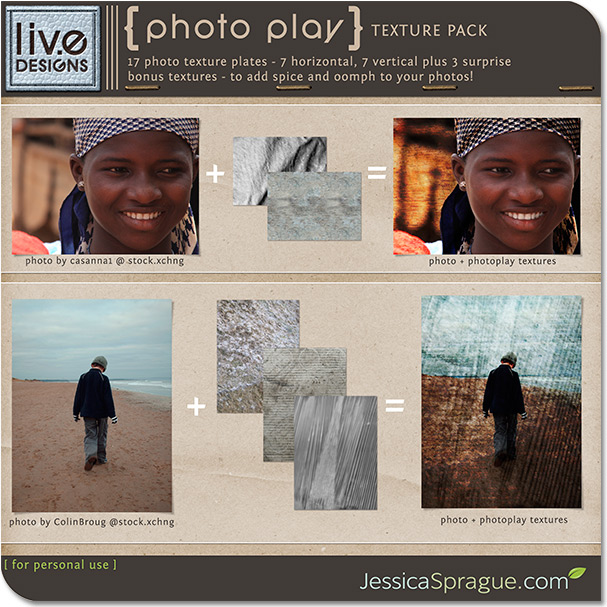
If you love the look of textures on your photos, you’ll love playing with my Photo Play Texture Pack, which happens to be on sale for just a buck today (till midnight of Wednesday Pacific time)!

{Click on the image above to grab this texture pack for just a buck!}

Here’s a sample of how these textures can bring that oomph and bang to your photos:

You can combine different textures to get totally different looks each time…

Or you can use one particular texture and play with blending modes, which is what I did here:

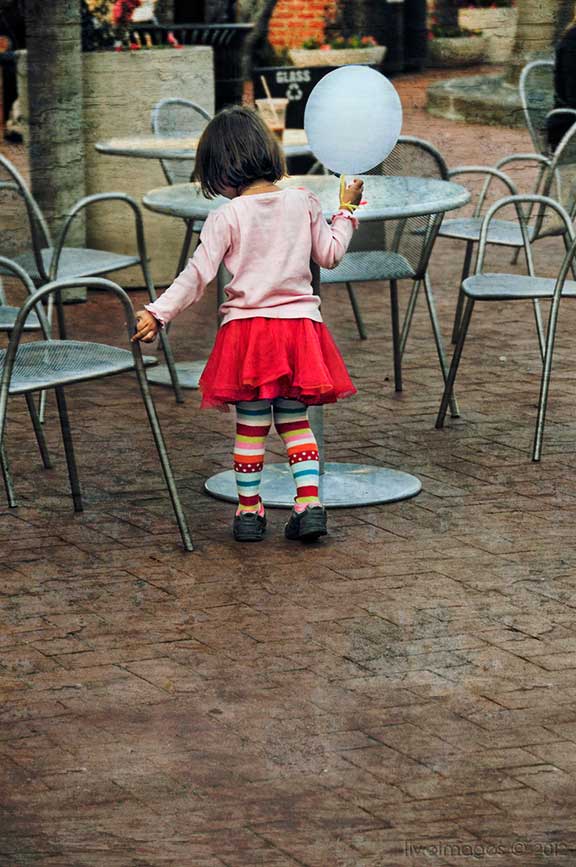
Original (Unedited) Photo:

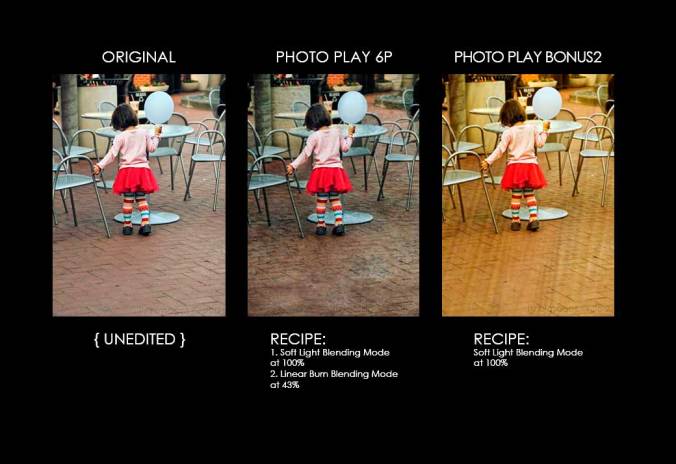
I used Photo Play Texture 6P on the photo and came up with this:

(I used a layer mask and with a low brush opacity, I erased a bit of the texture from the little girl so that the texture was retained but did not overpower the subject).

I used Photo Play Bonus Texture #2 and this is what I came up with:

Here’s the recipe I used above, in case you’re interested (though the textures work differently depending on your images… and that’s a wonderful thing, because it means that you can play and experiment with different textures, different blending modes, different opacities, and the possibilities are just mind-boggling!)

As always, you can click on the images to view them at larger sizes. 🙂

Wonderful (Half-Off) Wednesday

I also have this wonderful element pack at half the regular price today (again, till midnight Pacific time)… and these are perfect not just for taping photos or elements or tags, but also for adding realism and texture to your creations (you can even put text on them!). These are real tapes that I have painstakingly and lovingly extracted for you so that all their rough, torn edges and crumpled areas have been preserved. Yummy, right? 🙂

{Click on the image above to grab this at 50%-off}

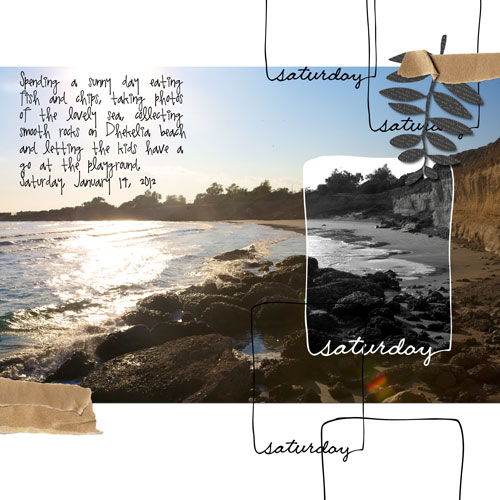
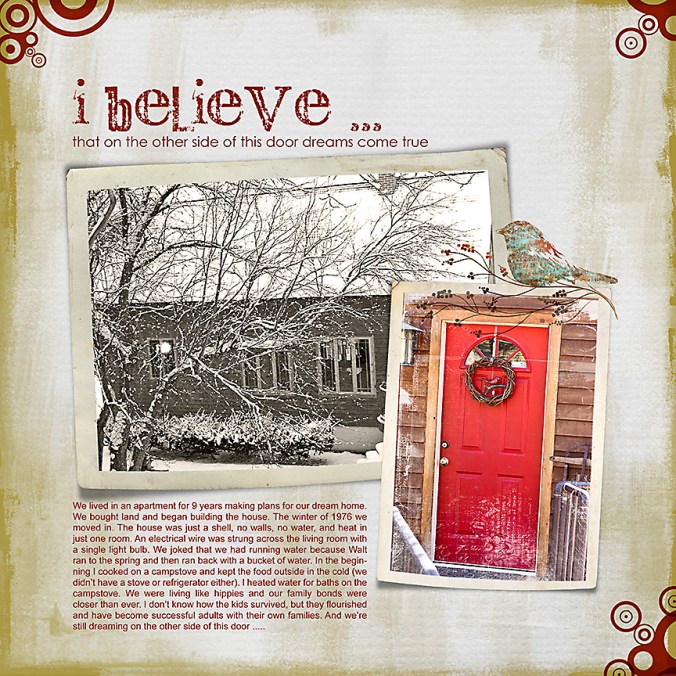
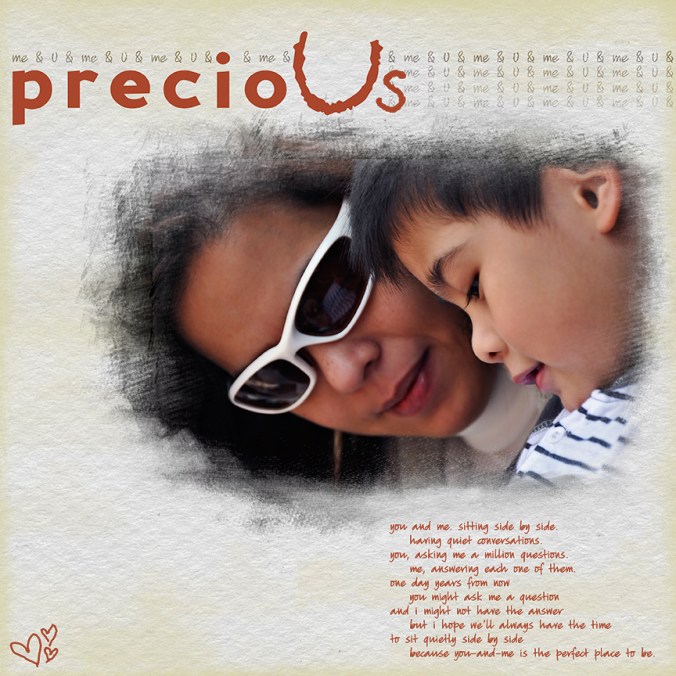
You knew I’d be sharing some fabulous layouts with you, right?

This one was created by Sarah:

This one was created by Margje:

This one was created by Reeta:

And here’s another one that Reeta created:

Five Essential Things… Photoshop Class for Free!

Ever wanted to learn Photoshop? Want to learn it in the most wonderful way, with video instruction and with the most supportive community plus the sweetest, funniest, most awesome instructor holding your hand (virtually) as she guides you through the Top 5 Photoshop Techniques that everyone should know?

You’re in luck because my dear friend Jessica (yeah, she of JessicaSprague.com 😉 ) is giving a FREE online class which is open to everyone!

Click on the image above to find out which specific techniques will be covered and how to get yourself enlisted for the Online Class which starts next week (but you can totally do it on your own time… as long as you register and sign up for the class, it’s yours forever. Yeah, you read that right. All our classes at JessicaSprague.com that you sign up for (free and purchased) are and have always been yours forever so that any time 5 or 10 years from now you want a refresher, it’ll still be right there waiting for you :D).

Alrighty then! Go have a most wonderful Wednesday, my dearies, and I’ll see you soon! xoxo

Old Photo Restoration & Digital Design

Sometimes it’s fun to have entrees, salads, soups, and appetizers, and other times you’re hungry enough to want to forgo everything and jump right into the main course. Today, we are hungry. 😆

So, right on to the main course of today’s blogpost, which I am so excited to tell you about!

We have three new courses over at the Spraground (otherwise known as jessicasprague.com).

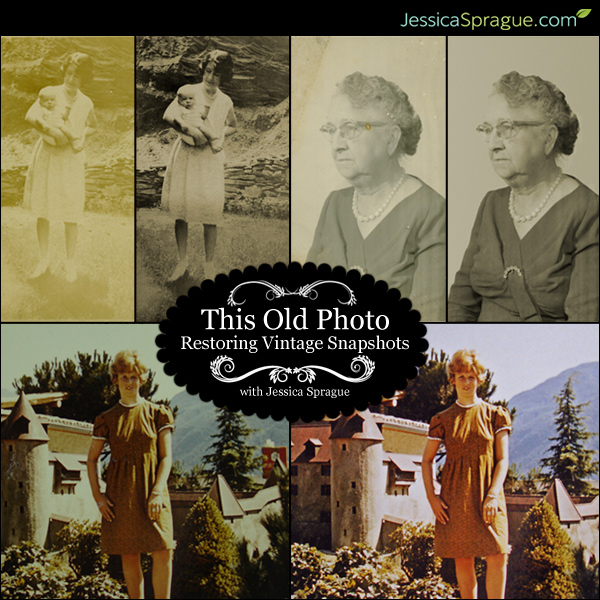
This Old Photo: Restoring Vintage Photos:

First, a class that has rated high on the in-demand list: old photo restoration! Do you have boxes full of old photos stored somewhere (now if I could only remember where…), perhaps in the attic, perhaps in the basement (hopefully free of humidity), and have always wanted to somehow save the lives of those precious mementos of those dear to us (and part of the reason why our hair and skin color are as they are)? Have you looked through them, marveled at them, and then sighed with slight despair upon seeing scratches, old-age stains, perhaps some acid from those nasty magnetic albums rapidly eating away at the dear smile of Great-Grandma carrying 3-year-old Mama?

Fear no more! In a two-week instructor-led class (led by no other than the master guru and one of my dearest friends, Jessica Sprague), you will learn from Jes herself how to restore those vintage snapshots to their former glory! (And considering how we can never go back in time and re-shoot those old photos, this is the next best thing to getting them looking like they did back then!)

Click on the image below to learn more about the class, This Old Photo: Restoring Vintage Shots:

This Old Photo: Restoring Vintage Shots

The class begins on April 26 and ends on May 9. Registration is ongoing! There’s a special price for this beta course (isn’t it great to be among the first to learn? heehee), and if you’re signed up for the email/newsletter, you get a coupon code with extra bucks off! Isn’t that awesome? 🙂

But wait. There’s more goodness!

The Art of Digital Design

Have you ever wanted to learn how to create those awesome digital papers and embellishments? Wondered what goes into the process? Been curious enough to want to dip your toe into the design pool and learn the secrets of creating, packaging, uploading, marketing, and selling digital product? Or maybe you don’t want to really sell your product but want to create your own and maybe keep your options open for the future?

Here’s another of the most in-demand courses doing its debut at the Spraground!

Click on the image below to learn more about this awesome course, The Art of Digital Design:

The Art of Digital Design

This is a 5-week class, led by no other than the fab Jessica Sprague, and it’s perfect for advanced digital scrappers who want to learn about creating and marketing digital product! The class will start on May 24 and runs up to June 28. Stay tuned for future announcements re: when registration will open… or you can click on the image above, then hit the Notify Me button to get the news about class registration once it opens, delivered right to your inbox!

Want to learn how to draw digitally?

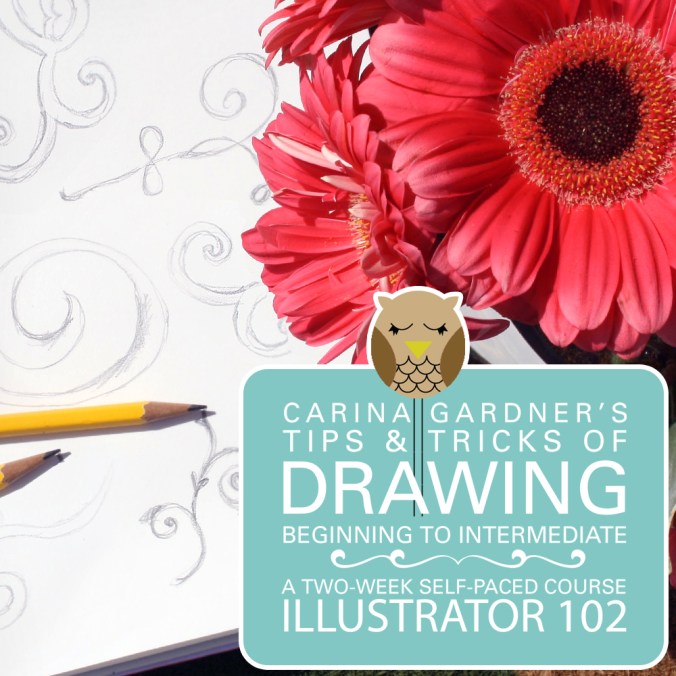
Or learn how to tackle that program that’s been sitting on your hard drive for so long because you needed a hand to hold yours and show you the ropes? Or wanted the perfect complement to the process of designing and creating for yourself? In a  follow-up to her fabulous first course, Illustrator 101: Designing for Yourself (in which you learn how to use Adobe Illustrator to create and build your own products, templates, cards, and more), the awesome Carina Gardner is now offering  Illustrator 102: Tips and Tricks of Drawing.

Illustrator 102: Tips & Tricks for Drawing

Carina’s class is self-paced, which means you can register *and* take the course immediately. Learn more all about it by clicking on the image above!

Looking for inspiration?

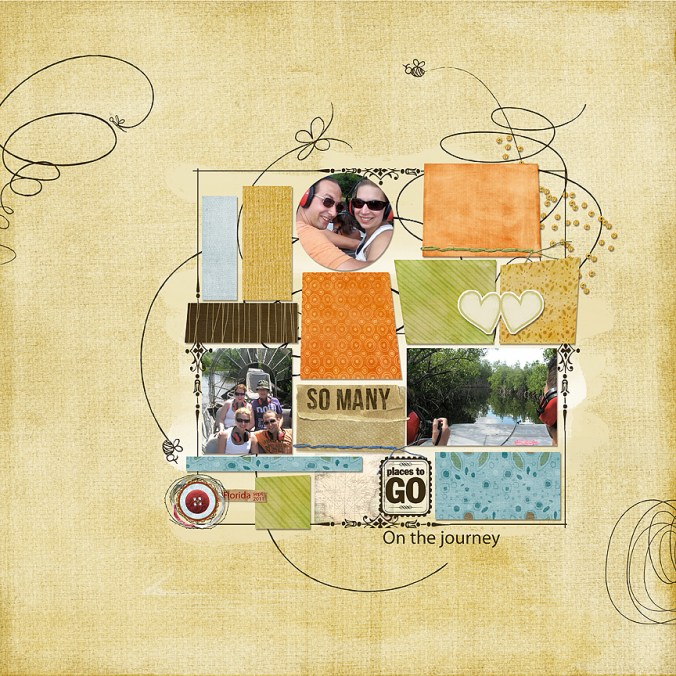
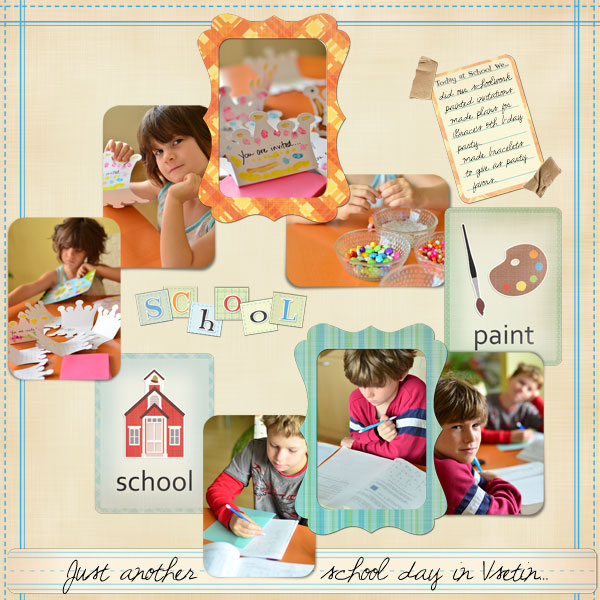
Seeing the fabulous layouts created by our Spraground Creative Team with my product never fails to both excite and inspire me! Check out the latest eye-candy!

Here are some layouts created with my Swirly Words Elements Pack…

… and my Swirdles pack too:

Can you tell I’ve been loving swirls lately? 😆 { NOTE: Images are linked to the shop, for those who are interested in knowing more 😉 }

I just looove the fresh look and the pretty little girl on this fab layout by Miki:

{ Her papers are also from my Gentle Morn Kit HERE }.

This wonderfully whimsical layout is by Chris:

And yet another one from uber-talented and uber-productive Miki:

Remember my Not Quite White Paper Pack from two posts back? Here’s what Miki made using it (just love the warm home-y feel of this layout):

And because these girls super-inspire me, I decided to create a layout which was inspired by Linda’s Spraground Challenge two weeks ago (We hold our challenges weekly… come join us? It’s open to everyone and free and fun! And you get the chance to win 5 Spragbucks!):

Looking for inspiration? (Part Two, lol)

We just wrapped up our Creative Search 2010, and boy, I have to say, I wish we could take in everyone who applied! The talent in the CT Search Gallery was just overflowing! Have a look here, and see for yourself… I’m pretty willing to bet my two little pinkies that you’ll come away from it totally inspired to take up your mouse, pen and tablet, or Cropadile (whichever your inclination is, :lol:) and start creating layouts left and right!

Check out the CT Search layouts HERE.

And stay tuned for the announcement of the final cut! (Biting your fingernails? I am, too! So exciting!)

Well, gotta get crackin’ on creating more schtuff! See you soon, my dear sweeties!

Beam me up, Scotty! 🙂

Last 2 Minutes to Snag a Great FREE Course!

Well, not really the last two (more like the last 24 hours), but do rush, do hurry, do run and sign up for this year’s final awesome FREE class at our Spraground! Registration ends at 11:59PM Eastern Standard Time.

Holiday2009Class-Announcement

Click on the image above and you’ll find yourself in our magical Spraground with all the EASY info you need to sign up for this awesome course. Did I say it was FREE? F-R-E-E! Wooooot!

You don’t have to have any special skills as pre-requisites for this course. You’re a digi scrapper? Come join us! You’re a hybrid scrapper? A paper-only scrapper? Come and join us too. Not a scrapper at all? Come join us too. You’re strictly into photography and nothing else? Or into just blogging? Or into just journaling and writing? There’s lotsa room for you too!

See? Everyone is welcome! Seriously! That’s because the main aim of Jessica’s newest (and this year’s last) course is to capture both the past and the present magic, memories, and wonderment of all that spells Holiday. And then come up with an album project as tangible evidence that we certainly have so much to celebrate and be thankful for.

What better way to prepare for this most awesome of all seasons? So tarry no longer, and click on that image, and join us for an amazing seven days of fun and frolic and falalala’s!

See you at the Spraground!

Free Photo-Editing Class, Fun Find & Freebie!

Oooh, I just love posts like this!

First things first: have you heard of the latest fabulous free class that’s coming to you real soon?

FREE FABULOUS PHOTO-EDITING COURSE!

PhotoEd2450ad

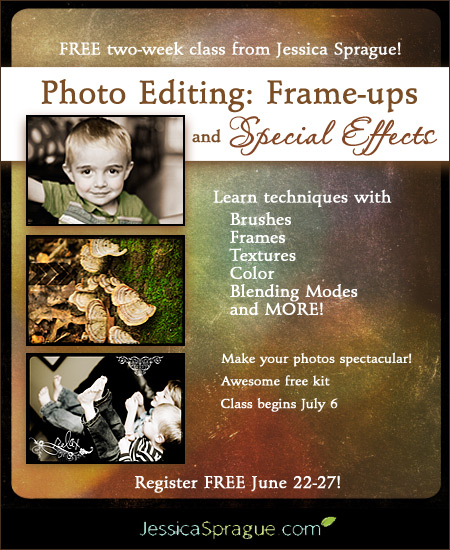
In the follow-up class to her hugely popular first Photo-Editing course, Jessica Sprague (and I’m proud to call her my friend! :D) brings more photo fun to you with her new and FREE Photo-Editing: Frame-Ups & Special Effects course!

The two-week instructor-led class begins on July 6th, with all the awesome stuff that come only with JessicaSprague.com courses! (Daily emails, a very friendly forum, screencast videos, a class private gallery, lots of love, and more!). Be sure you don’t forget to sign up and register (did I already say FREE?) for the course when you come around to our Spraground on the week of June 22-28. We’ll be celebrating our second Spraground birthday on this week, and let me tell ya, we’ve been working hard behind the scenes to make sure that you’ll have an awesome time celebrating with us (how does “amazing giveaways and exciting announcements” sound to you? 😉 )

What will you need to take this course? Just Photoshop or Photoshop Elements (no experience necessary, and if you don’t happen to have Photoshop/Photoshop Elements, all you need to do is click on the image above, and you’ll zip right to our homepage where you’ll find a link to a free trial download of the program! Awesome, isn’t it? )

So mark your calendars, set your date alarms, and I hope to see you at the Registration line in about a week! YAY!

NOTE: Click on the image to learn more about the course!

FUN FIND

So I was moseying down netland and guess what I found?

PhotoFunia-22eb1d4-liv

Bwahahaha. That’s about the closest I’ll ever get to finding my photo on a wall. 😆

There is an amazing variety of stuff you can put your face (or your friends’ faces) on at PhotoFunia.com, from walls to magazine covers to coins and t-shirts and museum gallery frames. You can even have some cool guy spray-paint your face on a wall filled with graffiti. 😆

PhotoFunia-2192b42-graf

(Snort!) Try it and watch time fly while you play. 😆

AND FINALLY…

I have a new pack up at our shoppe at JessicaSprague.com…

T-Stickies:100% is the first in a series of textured stickers (thus, the T in T-stickies 😉 ). This one is a set of 30 glossy, slightly-crumpled, textured stickers in five colors. The 100% labels are separate from the words so that you can mix and match them to your delight! 🙂

LivE-Tstickies100-img

* Click on image to go to the shoppe *

And because you know I love ya, here’s a little freebie from the pack (this one is curled, pre-shadowed, and pre-matched so that all you have to do is pull it onto your layout and voila! 😉 )

LivEdesigns-FM05-100Treasured-img

* Click on the image to download, and thanks for the love you leave on my blog as you snag this freebie!

And that’s all the F’s we’ve got for today, folks! 😆

Have a wonderful day! I’m off to bed! ((((hugs))))

Resolutions, Resolutions

Have you made yours yet? 😀

I make daily resolutions (easier to do a check and balance that way, and there’s something very soothing when, if you find you’ve been unsuccessful with the day’s resolution, you know you have the option to say, “Well! Tomorrow’s another day!” a la Scarlett O’Hara 😉

Still there’s something quite auld-lang-syne-ish (okay, I just invented that adjective, haha ) about making the traditional New Year’s Resolutions.

So… what’s on your list?

Guess what’s at the top of mine.

dsc_0172-jan051

Hehe… I’ve been oinking along since the middle of December, shame! (Well, I had to put the new weighing scale to good use, right? 😉 )

Seriously. Oinking. So this must be at the top of my list, most definitely.

live-todo2009

And there’s more.

More walking, for one.

My 16-year-old son has been convincing me that I need exercise while respectfully omitting the “older people need all the exercise they can get” part, something I am grateful to him for. Bahaha!

Speaking of which, some days ago, my 13-year-old R –who’s a total movie buff–and I were talking about… surprise!… movies. He was telling me he didn’t want to watch some movie (I forget which one, but I think it was One Flies Over the Cuckoo’s Nest) because he couldn’t stand to see Jack Nicholson with hair (it was filmed in the 70s). He said it wouldn’t seem like Jack Nicholson if the guy had hair.  ???  (Don’t worry, I didn’t get it either >teehee< )

So I said, “Why? How old was he when they filmed that movie?”

He said, “I don’t know, but he certainly had more hair than he has now. He’s really old now. He’s ancient! He doesn’t have much hair left.”

“Really?” I said. “How old is he now?”

“I don’t know… Old! Forty?”

Ahem. 😯

So. I must walk if only to prove my youth to my growing sons. Aside from the fact that exercise is good, of course. Especially in this ooooold age of ours (*tongue in cheek*).

Okay, so I won’t kill you with all the details behind my resolutions.

But I will just mention this, because it has to do with the word for the month that my dear friend Jes blogged about here.

What was your word? Mine was… tada! PRAY! Hence my No. 3 resolution! PRAY more! Don’t get me wrong, I do pray everyday. But I figure it’s a wonderful thing to do more of, and one can never lose by doing it more.  I also truly believe that work done to the best of one’s abilities and offered up is prayer, so this is my way of reminding myself to turn everything I do into prayer. 😉

So. Five resolutions. Spiritual, health, personal aspects: check, check, check. I’m good. (I figured I’d stop at five. Five is do-able. Six? Seven? Eight? Too much room for me to fail. Haha! I’ll go the safe route and stick with five. )

What about you? What are your new year’s resolutions? If you share them with me, then we can encourage each other and cheer each other and support each other throughout the year! We’ve got… what, more than 300 days to make sure these things happen! Alright!

New year, new lessons: Stitching, anyone?

I have to say… I am totally a sucker for cheap thrills, and one of the biggest sources of thrills for me is learning a new thing! There are few things that make me feel more alive than discovering new things, no matter how tiny and little they are in the bigger scheme of things.

So… did I say I spent the latter half of the holidays (till New Year’s Day) in the southern mountains with my sisters and brothers? Did I mention that most of our time was spent exercising our jaws and stomach muscles? (READ: oink! oink!)

Anyway, we stayed at this fab fab fab place (and no, we don’t own it–we rented it 😀 ), with space huge enough to house 4 families (which we were), with an almost 180-degree view of the world’s smallest volcano and lake within a lake (it’s one of the places that author Patricia Schultz lists in her book 1000 Places to See Before You Die).

I was so awed by the place that I just had to take photos… so I took 8 photos of the view as you come down the stairs from the entry, knowing at the back of my mind that Photoshop would help me stitch them together. I’d never attempted to use Photomerge in the past; in the past I had always stitched photos by hand (Riiiight. That makes it sound a bit like doing a cross-stitch sampler, doesn’t it? 😛 ).

So I tried Photomerge for the first time last night, and oh, boy, I hafta say… it’s the *easiest* and most thrilling thing to do! Loooove how Photoshop takes all the hard work and does it for you! The only thing you need to do is (1) have enough RAM; and (2) know how to fill in the missing places once the photos have been stitched together (something that can be accomplished with the clone tool).

So. I began with 8 photos and ended up with this one:

thouse-stitch-8x26w

(You can click on the image if you want a larger view. Originally, this photo was roughly 12+ inches by 36+ inches after stitching. I reduced it to about 8×26 in).

I promised some of my girlfriends that I’d share how I stitched this together (it’s really easy, and I so love sharing easy stuff!) Note: I use CS3, so am so sorry if you use PSE, but I’m totally in the dark as to whether Photoshop Elements 7 has this function as well or not. 😳

Here’s how to do it with CS3:

1. Open your photos that you want to stitch into a single panoramic photo.

2. Drag your photos onto a single document. Make sure that you hold down Shift as you drag in each photo so that it comes in centered on your document space. It doesn’t matter if on your layers palette you notice transparent spaces on some layers as a couple of photos end up in different areas of the total document size. As long as they’re centered when they come in, you’re good to go.

I used one of the photos as my base document and then saved it under a different name so that I don’t write over the original photo. It’s important to ensure that none of the photos save for the background layer is locked. Otherwise the photomerge function won’t work.

It might be good to note, too, that if you’re pulling photos straight out of your camera and you shoot in super fine mode  or whatever the highest quality of your images are in your camera, you’re going to end up hogging the memory of your compy… so ideally you’d want to ensure that you have enough RAM to work with (if your RAM is limited, you’ll probably want to close other open documents and programs while you’re stitching).

Since I shoot 98% of the time in RAW, I first saved all my photos (without post-processing them) as jpegs. I post-processed at the end, after the photos were stitched.

3. Once you have all your photos in the single document, shift-click on the top and bottom layers to select all of them (they should all show up highlighted on your layers palette).

4. Go to Edit > Auto-Align Layers > Auto. You’ll get four options (Auto, Perspective, Cylindrical, Reposition Only) in the popup menu… I chose Auto. Guess what. I ended up with a stitched photo that looked like the Cylindrical option icon. I guess Auto makes the best decisions for you, which is a great way to do away with all the guesswork!

5. Wait while Photoshop does all the work. Go get yourself a cup of cafe moccha, or maybe munch on some Royce Potato Chip Chocolates (ha! Now you know what I was doing)… because depending on the number of photos you’re stitching together and your RAM, and oh yes, your patience level as well, this is going to take a bit of time.

6. When you come back, munching and sipping, you’ll be delighted to see on your monitor that Photoshop has done all the hard work for you.

Initially I started out with 14 photos to stitch, actually. There were some similar views, so when my stitched panorama came out, some of it looked a bit wonky. Not a problem. I found the layers that those almost-duplicate photos were on and deleted them from the layers palette.

It also helps to know before you take the photo that you’ll want to take each series of photos from the same height, more or less, if you’re planning to stitch them. (So, ideally, if I wanted a shot of the entire window view, I should’ve used a tripod, moving from left to right as I shot the photos… then to get the roof area, I would’ve tilted my camera on my tripod,  again shooting from left to right. That way, I wouldn’t have ended up with huge gaps on my stitched photo and would have probably not needed to do any work with the clone stamp tool. But that’s in retrospect. For next time. 😉

Now you might find that your photos look a bit strange with different shades on them (assuming you didn’t do any post-processing beforehand); if this happens, worry not! Photoshop, our dear friend, will take care of that for you too! Here’s how:

7. With all your layers still highlighted on your layers palette, go to Edit > Auto-Blend Layers.

Wait patiently, knowing that this will take significantly less time than the stitching did a few minutes ago.

Blink your eyes a few times, and voila! MAGIC! The white balance and all the shades on your photos will be blended so they look … PERFECT! Or… sometimes, almost perfect, in case you end up with some transparent areas on the sides of your stitched photo.

Now what to do if you a less-than-perfect panoramic photo with some gaps on its sides on your monitor, same as the one I found on mine? (hehe. Don’t you just love experimenting? You learn a lot that way! LOL) Again, no worries! 😀 Paint in the missing parts with your clone stamp tool. That should take you longer than the stitching process… but since the stitching is the harder part of it, and Photoshop has done it all for you, what’s there to grumble about with the clone stamp tool at one’s disposal, right? heehee.

9. Do whatever post-processing you want to do with your photos, in case you shot in RAW, and voila! Perfect panoramic photo! YAY!

Now, for a bit more about the scene on my stitched photo:

This house was awesome (as you can probably tell, since I’m still raving about it a couple of paragraphs down this post.)

You enter through a gate and drive down a relatively short path till you get to the front door and the rooftop deck where you can host parties and get-togethers (as long as there’s no slight drizzle) and have a 360º view of the landscape.

You enter through a massive wooden door and go down a couple of flights of stone steps and enter a huge place where you have a split-level living area connected to the dining area with an equally huge kitchen right beside the dining area.

There are four huge bedrooms with their own bath/washrooms (perfect to house my little family and my sisters’ families… we moved in for New Year’s Eve as we had been staying at our own place in the country club earlier).

Then there’s a nice little pool which the teenagers were the only ones brave enough to dip into (cold winds, cold water? No, thanks!). Beside the pool area, with its uber-lush pine trees on one side, is a viewing deck from which you can marvel at nature’s wonders… and if you fancy a warm adventure with water but without the biting wind, there’s a sauna/hot bath a few garden steps below (I wasn’t brave enough to try that either… because it involves getting out into the cold winds before you get back to the house, haha!)

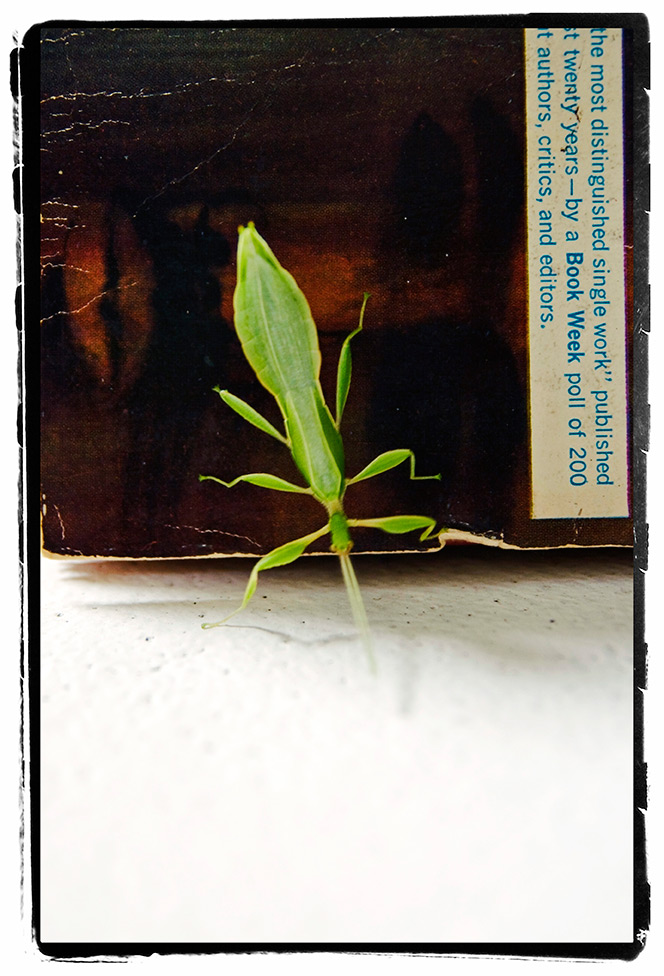
Surrounded by nature on all fronts, thank goodness we only encountered this little fella in the garden:
leafinsect01

Well, whaddayaknow? A visit from one of those leaf insects that you see on the pages of National Geographic. I normally don’t like bugs (hate, hate, hate cockroaches… you can’t even get me to squish one. Ugh, that awful crunch as you smack them–notice I say “you” smack them because I’ll be the one running in the other direction at 200mph. And they fly! And they bite! And they stink! Uggggh. Shudder.)

But this is no roach. So okay, I’m fine with this, and I can stick around long enough to take its photo. Since we were in the mountains, I only had one lens with me (my lucky brother brought his macro… I’d love to see how his photos turned out!). I wonder how the poor insect felt with all those lenses a million times larger than him, all aimed at his little body. My nephew “held” the insect on his old and tattered book, and it crawled onto the ledge long enough for us to shoot a few more frames till my sister said “Eeeek! Get it out now!” End of photo session. 😆

One more time, up close, sans macro:

leafinsect02

Recalling the Resolutions (Do you feel the freebie coming? :D)

What was No. 4? Create weekly? Let’s take that resolution seriously today, and let’s see what we’ve got here:

Oooh! A freebie! 😆

But first, I want to say THANK YOU to all of you for your warm fuzzies and for sharing with me how you’ll be doing Project 365 (or some variation of it). The 12 on 12s is a great idea! I have to admit that I’m still sitting on the fence on this one, wondering if I’ll end up doing a daily (20% chance), weekly (40% chance), or a monthly (40% chance) project. I’m wondering: if I just upload my daily photos onto my blog, does that count? ROFL. (Oh man. I so feel like Charlie Brown right now, sitting on the playground bench, watching everyone play and wondering what to do next. bwahahaha)

So anyway. You know how there are ten million options open to everyone, and anyone can do what their heart desires, right? (That’s what I love about scrapbooking and art and creating! There are no hard and fast rules! Just create! And have fun!)

One of these many options I’ve heard about is this other easy approach to housing and documenting the photos, which involves using a 4×6 slip-in photo album and turning it into a scrapbook (think: you have the option to put in photos or journaling tags or digitally scrapbooked 4×6 pages, or whatever you fancy!). Have you heard about this?

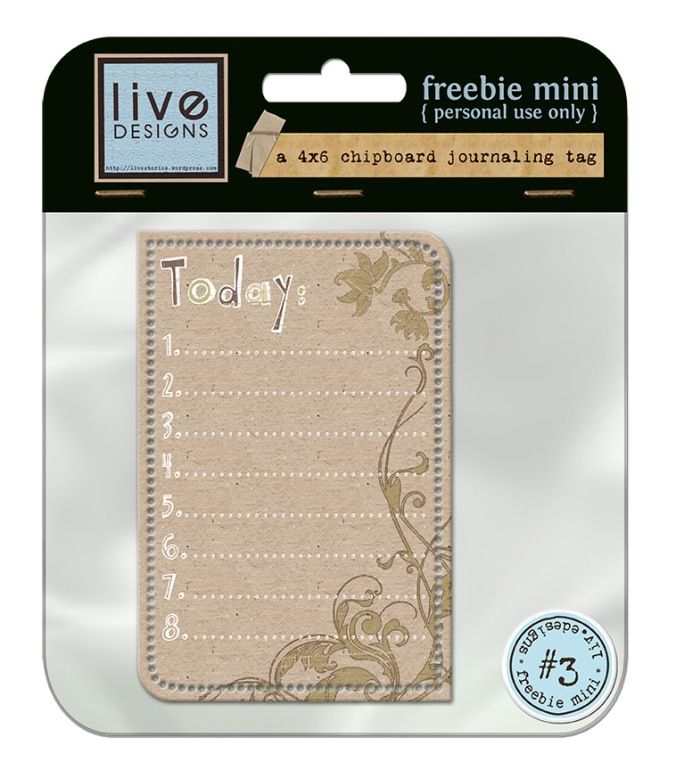
Personally I love the square size of 8×8’s so I probably won’t be attempting this anytime soon (and need a reason to use all the Bind-It-All schtuff I ordered! :D). But I can imagine wanting to try this approach one day. So for those who are doing this approach now, and for those who are doing the regular 12×12 or 8.5×11 or 8×8 or whatever size pages, this freebie mini is for you and you and you! Anyone can use it!

I made this chipboard journaling tag, with rubbed-on designs, which you can use for Project 365 or anything else, really. (It just came in really handy for jotting my resolutions on, haha!) And it’s sized at 4×6, so if you want to go the hybrid route and print this out and write on it, and then slip it into your 4×6 album pocket-pages, or attach it to your cardstock, you can! Or if you want to digitally attach it to your purely digital layout, you can too! (I didn’t include shadows so that you have total freedom with how you want to position it on your layout and where you want the lighting effects to be).
livedesigns-freebiemini03-img

Click on the image to download. And thank you so much for the love you leave as you download. 🙂

I’ll be back soon with more photos to share… for now, I have to get to tutoring the kids with their homework, and doing my own homework as well! 😉

(((hugs))) and see you soon, sweeties! 😀

Too Cool!!!

Okay, I’ve just had an incredible a-ha moment, and I want to jump for joy! Course I needed to run back to you and share the joy! (Uh… if you’ve already known this, then clap your hands and pretend you’re hearing it for the first time, okay? 😆 Just kidding!!! 😆 )

So I’ve begun working on a kit that I want to give as a freebie (nudge nudge wink wink!) 😉 When I work on a freebie, I make these little squares and fill them with colors, while I try to decide on a color scheme for the kit…

Well, I got carried away with playing, and before long I had about 80 squares to fill with colors. I had copied and pasted these squares originally (think 80 layers)… and wait! Before you go zzzzz on me, let me tell you what I was wanting to do… I wanted to move up the 1st to the 8th row so I could accommodate one more row of 10 squares below them. Normally, I would select the top layer in the layers palette, hold down shift, then select the last layer on the layers palette. This, as you know, would select all the layers in between as well, so that I could move them as one entire group.

Confession time: a good deal of stuff that I’ve learned about Photoshop has come from playing and experimenting (of course the base of my Photoshop knowledge has always come from my dear friend Jessica)… Anyway, so I was in that playful mood, and I thought: well, what would happen if I just draw a selection around all these squares that I want to “catch” using my move tool?

So I tried it… and guess what? IT WORKED!!! WOOOHOOOOOO!!!!

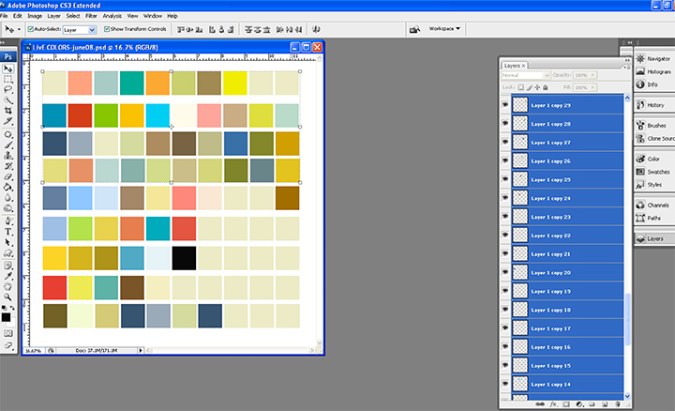
So actually, if you want to select several items on your workspace / layout, select the Move tool and draw around it (make sure you have the Show Transform Controls checkbox checked so you know what you’re capturing with your move tool)… and when you let go of your mouse button, all that were included in your selection become highlighted on the layers palette and you can move them as a group!

Here’s a screen shot:


You’ll see that there’s a bounding box around the squares that I selected with the move tool (it appears as you draw around the squares with your mouse, so it’s a great guide that lets you know just which items you’re selecting). And over on the layers palette, you’ll see all the layers are automatically selected.

TOO COOL!!! Hee hee hee.

Well, that’s it for the intermission! Just wanted to share an a-ha moment with you! 😆


She’ll Be Comin’ Round the Mountains..

when she comes… 😆

Hello from the mountains!!! I’ve been stuck here (happily, I must admit–mostly. I’d be in heaven if I had my desktop here with my CS3 and my dsl connection) for almost a week, spending vacation time with family. I’m writing now from my dinosaur laptop, which doesn’t even have 1GB of RAM (yeah, yeah, sorry isn’t it?)… so, much as I’ve been dying to design and scrap some layouts, I just don’t have those options open to me right now. But you know what? I’ve been scribbling on my notebooks my ideas for more designed freebies, and I promise you when I get back down to civilized lowlands, I will have a lot of gifties waiting to be created and shared with you! Woohoo!!!

I am posting here though on quick notice, upon request from my friend and fellow Spraggirl, Susan. She referenced me on her blog (bless her!) regarding how I keep track of my layout credits, and she has requested me to repeat the instructions for those who have been wanting to know more.

So… here they are, my dear Susan, and many thanks once more!

The Importance of Credits

I really believe that listing credits is a hugely important habit to form, especially in the world of digital scrapbooking where we often share our layouts on galleries, on our blogs, or even in magazines if we’re lucky enough to get published. I have never yet come across a TOU (Terms of Use) from a designer who says “Please, whatever you do, don’t give me credit and don’t say that I’m the one who created this item you’re using to create your layouts!” 😆 Some do say “credit is not necessary” but they’ll also tell you that if you do decide to give credit, they will certainly be appreciative and grateful.

Considering that it only takes a minute to list these credits down, why not take that extra step to express our gratitude and appreciation for the hard work that designers put into making these designs that we happily use to display our fondest memories with, right? (Because it really is not easy to design stuff… fun, definitely–I love it!–but it is a lot of hard work that goes into the littlest thing that is created… and a lot of love! So it’s always nice to give love back when it’s given to us in the form of the digital schtuff that we’re using).

So… credits. Love ’em. Keep them. Announce them. You know the saying, “Give credit where credit is due” ? Lot of wisdom in that one. 😉

So how do I do it?

I’d like to believe that everyone in the scrapping world would love to give credit (scrappers are an amazing bunch of loving people)… the problem, I think, comes in when we have used items, changed our minds, replaced those items, and then at the end of it all, we forget from which folder we pulled out this paper and that element… 😆

So I think the easiest way is to keep track of the credits as soon as we pull in the background paper (which I assume is always the first thing we get onto a new document) and then keep adding to that… and editing the credits to reflect changed items either as we go or at the end when our layout is complete.

There are a million ways to do this–and I think this ability to do the same thing in different ways is what makes digital scrapbooking rock! It’s simply a matter of finding which way works best for you! Some people keep a notepad open where they list the items; other people make a new layer and write all the info there; etc. I’ve tried several ways as well (including making an Excel file to keep track of everything), and through trial and error, I’ve found the best way that works for me is to use the File Info option in Photoshop. (I’m sure also that I’m not the only one who has discovered this, so I can’t take credit for thinking up this process! 😀 )
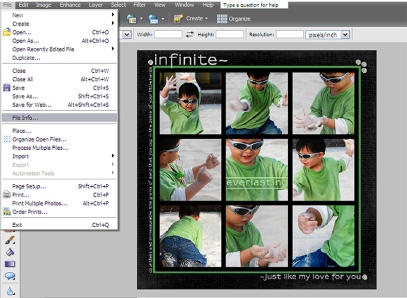
Both Elements and full-version Photoshop have this File Info option.

This is how I keep track of credits:

1. Go to File (on Photoshop main menu)) > File Info. Bear in mind that we need to have a document open in order to have this option open to us. Otherwise, with nothing open on our workspace, we won’t see this option open to us).

File Info

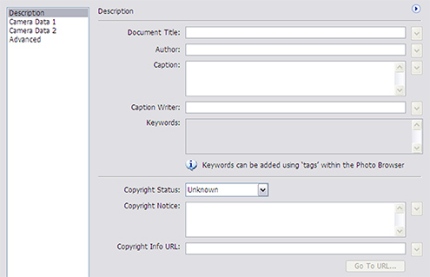
2. In the dialog box that opens, we can put in the title of our document or layout, we can put our name as the creator, and in the Description box, we can also type in all the materials we’ve used, together with the designers who’ve made them.

File Info Dialog Box

NOTE: Screen shots are from PSE5 since that is the only program I have loaded on my dino laptop. 😉

The great thing about this is as I work, I input the information in the File Info box instead of having to open another document or file to keep track of the credits. And when I save my layout, the File Info gets saved along with the document. YAY! No more having to save and store together two different files referring to the same layout!

Then, when we need to put in the credits (say, if we upload our layout into a gallery or onto our blog), all we have to do is click on File > File Info, highlight the content in the Description box that contains our credits list… then copy/paste the information onto the Description area on our gallery upload dialog box, and voila! It’s all there!

What I love about this is that it’s kept separate from the LO itself, but in the same “drawer”– if you will– so that it never gets “lost”. Also, if midway I decide that I want to replace a particular item that I’ve used on my layout and inputted into my File Info, all I have to do is delete that item from the list in my File Info box and add in the replacement details. Then when I hit Save to save the file, everything is replaced as well with the updated credits list. Awesome, isn’t it?

Hope this is of help to anyone who can use the info! (By the way, the File Info of your photo files already contains all the EXIF details pertaining to your photo–isn’t that marvelous?)

Alrighty then, back to the mountains! Catch you again soon!

Extra(ct)! Extra(ct)!

😆

Sorry, I couldn’t resist that! 😀
I’m putting my scrapping on hold for a little while to answer a question that my friends Heather and Kari asked on our playground about extraction. I’ve tried more than a million times (okay, so maybe I  exaggerate, but it certainly felt like a million times! Maybe it was 999 times at least ) to post my answer, but the words ended up garbled and jumbled and doubled… in short, my post would have left my friends more confused than helped.

So… I decided to post it here, so that everyone can share in the answer as well (unless it doesn’t interest you, in which case you’re perfectly welcome to skip along to the next topic. 😆 ) Before we start, kick your shoes off and wiggle your toes, get real comfy and grab a cuppa joe or a tall glass of iced tea, because this is not going to be a short post. haha.

Alrighty then: Our topic for today, dear class of two (or more) 😆 , is How to Extract.

I can tell you how to do it in PSE5 and in CS3… I have no idea how to do it in PSE6 but I suspect it should be pretty similar to PSE5.

Extractions

There are many ways to extract objects using various tools (magic wand is an option, as is using the background eraser)… but I’ll share with you what I work with best (Caveat: I’m no expert, okay? I’m just a Photoshop-player 😆 )

The first step is to work with a duplicate layer. Always a good thing. 😉

FOR PSE5
1.  Go to Image > Magic Extractor

2.  In the dialog box that pops up, you’ll find instructions at the top. Just follow them. Keep in mind that the red-pen tool (1st on the left) will define the parts you want to keep and the blue will define the parts you want to remove. You can make simple dots or lines or squiggles (whichever rocks your boat) to cover these areas, though I’ve found that if you’re dealing with a photo that has very similar colors, it helps to get as much variations of those colors marked. The red and blue pen tools (not their real names; those are just nicknames I’ve given them because of how they look) are actually brushes; therefore, you can adjust these to the size you want using the [ and ] hotkeys.

3.  When you’ve done this, click on Preview on the right. If the extraction looks not great at all, don’t worry. We’ll fix that up in a minute. Take the purple eraser (3rd tool, left) and erase the blue and red marks you just made. If you need to, click on the magnifying glass towards the bottom to zoom into your image so you can catch those red/blue marks that may not be immediately visible from a more distant view. Click on the hand (last on the left) to move your image around your workspace if needed. Just make sure you get all those red and blue marks erased.

4.  To refine your extraction, use the dotted circle brush (4th) to add to the selection parts that may have been inadvertently removed earlier, or the dotted circle eraser (5th) to remove parts that were left behind.

5.  When you’re happy with what you see, click on OK and that’s it!

Pretty easy right? Beats using the magic wand tool and the background eraser tool (which can sometimes remove parts from your extracted item that you wouldn’t want removed).

For CS3:
1.  Select the layer of the object you want to extract. Go to Filter > Extract

2.  Define your tool options (brush size, colors you want to use for highlighting and filling, etc.)

* Check Smart Highlighting if you’re extracting an object that has well-defined edges.

* Check Texture Image if you’re dealing with a lot of texture either in the object itself or in its background.

* Smooth – Choose 0 or a small value; you can always change this in the next extraction if it needs tweaking later on.

3.  Select the Edge Highlighter tool and drag it so that it slightly covers both edges of the object (a bit of the inside of the edge of your item and a bit of the outside or background that you want to remove). If you’re dealing with wispy stuff, choose a larger brush. You can use the eraser tool if you need to erase wrongly marked highlight areas.

4.  Use the Fill tool to fill the highlight-defined area.

5.  Click on Preview. Hitting the Show button will allow you to see both the original and the extracted views. I recommend using the Display view as well, so that you can see if there are any stray leftovers. You can use Display to view your extracted image against a color background for better viewing. This comes in really handy when you’re extracting something light and you need a darker background to detect stray marks.

6.  If you find stray marks in the background area, use the Clean Up tool. If you press ALT while using the cleanup tool, you can also bring back areas that were inadvertently deleted from your extracted image.

7. Click OK when you’re happy. And voila!

Pretty easy to extract, isn’t it? Gotta love Adobe. I mean, really.

GoodReads Great Read

Okay, so how pathetic is it that I haven’t been able to update my goodreads site? I have tons of books spilling over on my bookshelves and yet as of a few hours ago, my goodreads bookshelf had ONE (that’s right O. N. E.) book on the “read” list.

Well, that’s changed as of today. (There are now more than one. 😆 )

I have two piles of books to read. And to cover. They remain untouched. Except for one book that I touched today. And boy, am I thankful I touched it today!

Writing Motherhood by Lisa Garrigues

This book was given to me by my childhood favorite playmate/bookmate/cousin, who’s also happens to be a published poet in the US (so proud of her!), last Christmas. Because I’ve been totally consumed by my January playthings (LOAD, the 2peas course, the NWR course at our playground, designing freebs), I haven’t been able to do much more than glance at the nice orange cover and make a mental note to open it one day soon.

Well, I did today, and I was hooked.

I have to say (and you’ll probably think I’m quirky for saying this, and you’ll most likely be right), I always judge a book, not by its cover but by its first line. 😀 If the first line or the first paragraph grabs at me and shakes me enough to make me sit up and say “wow!” then it has me at hello. 😆

This book had me at the first line on its inner bookflap.

This book totally made me think of my playground friends! Its very title already made me think of this wonderful bunch of creative playground sisters that I have: “Writing Motherhood: Tapping into Your Creativity as a Mother and a Writer” (Okay, so maybe not 100% of us are mothers, but I’m sure 100% of us have moms 😆 )

The bookflap blurb says “Drawing on her own efforts to balance the demands of motherhood with her dream of writing, she (Lisa Garrigues, the author, who is also a longtime writing teacher) shows readers how everyday life can be a rich source of stories, and how writing can provide a means to both understand and document their experiences.”

Cool! 8)

Doesn’t it make you want to read more about it? 😀 I did a review on the book on my goodreads site; I’m not sure it’s a great review, but it should give you an idea of what it contains. You can click here or on my goodreads link over on the sidebar on the right if you’re interested to know more.

Alright then. I need to go back and do some creative work (and resist the temptation to finish this book tonight!). I’m again 3 days behind on LOAD and a lot of days behind on my next freeb for you!

As the great Tigger would say, Tata For Now! 😀