Extra(ct)! Extra(ct)!

😆

Sorry, I couldn’t resist that! 😀

I’m putting my scrapping on hold for a little while to answer a question that my friends Heather and Kari asked on our playground about extraction. I’ve tried more than a million times (okay, so maybe I  exaggerate, but it certainly felt like a million times! Maybe it was 999 times at least ) to post my answer, but the words ended up garbled and jumbled and doubled… in short, my post would have left my friends more confused than helped.

So… I decided to post it here, so that everyone can share in the answer as well (unless it doesn’t interest you, in which case you’re perfectly welcome to skip along to the next topic. 😆 ) Before we start, kick your shoes off and wiggle your toes, get real comfy and grab a cuppa joe or a tall glass of iced tea, because this is not going to be a short post. haha.

Alrighty then: Our topic for today, dear class of two (or more) 😆 , is How to Extract.

I can tell you how to do it in PSE5 and in CS3… I have no idea how to do it in PSE6 but I suspect it should be pretty similar to PSE5.

Extractions

There are many ways to extract objects using various tools (magic wand is an option, as is using the background eraser)… but I’ll share with you what I work with best (Caveat: I’m no expert, okay? I’m just a Photoshop-player 😆 )

The first step is to work with a duplicate layer. Always a good thing. 😉

FOR PSE5
1.  Go to Image > Magic Extractor

2.  In the dialog box that pops up, you’ll find instructions at the top. Just follow them. Keep in mind that the red-pen tool (1st on the left) will define the parts you want to keep and the blue will define the parts you want to remove. You can make simple dots or lines or squiggles (whichever rocks your boat) to cover these areas, though I’ve found that if you’re dealing with a photo that has very similar colors, it helps to get as much variations of those colors marked. The red and blue pen tools (not their real names; those are just nicknames I’ve given them because of how they look) are actually brushes; therefore, you can adjust these to the size you want using the [ and ] hotkeys.

3.  When you’ve done this, click on Preview on the right. If the extraction looks not great at all, don’t worry. We’ll fix that up in a minute. Take the purple eraser (3rd tool, left) and erase the blue and red marks you just made. If you need to, click on the magnifying glass towards the bottom to zoom into your image so you can catch those red/blue marks that may not be immediately visible from a more distant view. Click on the hand (last on the left) to move your image around your workspace if needed. Just make sure you get all those red and blue marks erased.

4.  To refine your extraction, use the dotted circle brush (4th) to add to the selection parts that may have been inadvertently removed earlier, or the dotted circle eraser (5th) to remove parts that were left behind.

5.  When you’re happy with what you see, click on OK and that’s it!

Pretty easy right? Beats using the magic wand tool and the background eraser tool (which can sometimes remove parts from your extracted item that you wouldn’t want removed).

For CS3:
1.  Select the layer of the object you want to extract. Go to Filter > Extract

2.  Define your tool options (brush size, colors you want to use for highlighting and filling, etc.)

* Check Smart Highlighting if you’re extracting an object that has well-defined edges.

* Check Texture Image if you’re dealing with a lot of texture either in the object itself or in its background.

* Smooth – Choose 0 or a small value; you can always change this in the next extraction if it needs tweaking later on.

3.  Select the Edge Highlighter tool and drag it so that it slightly covers both edges of the object (a bit of the inside of the edge of your item and a bit of the outside or background that you want to remove). If you’re dealing with wispy stuff, choose a larger brush. You can use the eraser tool if you need to erase wrongly marked highlight areas.

4.  Use the Fill tool to fill the highlight-defined area.

5.  Click on Preview. Hitting the Show button will allow you to see both the original and the extracted views. I recommend using the Display view as well, so that you can see if there are any stray leftovers. You can use Display to view your extracted image against a color background for better viewing. This comes in really handy when you’re extracting something light and you need a darker background to detect stray marks.

6.  If you find stray marks in the background area, use the Clean Up tool. If you press ALT while using the cleanup tool, you can also bring back areas that were inadvertently deleted from your extracted image.

7. Click OK when you’re happy. And voila!

Pretty easy to extract, isn’t it? Gotta love Adobe. I mean, really.

GoodReads Great Read

Okay, so how pathetic is it that I haven’t been able to update my goodreads site? I have tons of books spilling over on my bookshelves and yet as of a few hours ago, my goodreads bookshelf had ONE (that’s right O. N. E.) book on the “read” list.

Well, that’s changed as of today. (There are now more than one. 😆 )

I have two piles of books to read. And to cover. They remain untouched. Except for one book that I touched today. And boy, am I thankful I touched it today!

Writing Motherhood by Lisa Garrigues

This book was given to me by my childhood favorite playmate/bookmate/cousin, who’s also happens to be a published poet in the US (so proud of her!), last Christmas. Because I’ve been totally consumed by my January playthings (LOAD, the 2peas course, the NWR course at our playground, designing freebs), I haven’t been able to do much more than glance at the nice orange cover and make a mental note to open it one day soon.

Well, I did today, and I was hooked.

I have to say (and you’ll probably think I’m quirky for saying this, and you’ll most likely be right), I always judge a book, not by its cover but by its first line. 😀 If the first line or the first paragraph grabs at me and shakes me enough to make me sit up and say “wow!” then it has me at hello. 😆

This book had me at the first line on its inner bookflap.

This book totally made me think of my playground friends! Its very title already made me think of this wonderful bunch of creative playground sisters that I have: “Writing Motherhood: Tapping into Your Creativity as a Mother and a Writer” (Okay, so maybe not 100% of us are mothers, but I’m sure 100% of us have moms 😆 )

The bookflap blurb says “Drawing on her own efforts to balance the demands of motherhood with her dream of writing, she (Lisa Garrigues, the author, who is also a longtime writing teacher) shows readers how everyday life can be a rich source of stories, and how writing can provide a means to both understand and document their experiences.”

Cool! 8)

Doesn’t it make you want to read more about it? 😀 I did a review on the book on my goodreads site; I’m not sure it’s a great review, but it should give you an idea of what it contains. You can click here or on my goodreads link over on the sidebar on the right if you’re interested to know more.

Alright then. I need to go back and do some creative work (and resist the temptation to finish this book tonight!). I’m again 3 days behind on LOAD and a lot of days behind on my next freeb for you!

As the great Tigger would say, Tata For Now! 😀

Oh. My. Goodness!!!

You will never believe what came in the mail today.

I got a package, I got a package, I got a package, woohoo!!! :mrgreen:

I received a notice from the post office this morning, telling me that I had a package waiting for me. I hoped against hope that it would be from my dear friend, Kari (I just received a couple of weeks back a beautiful Christmas card from our mutual friend, Laurie, that totally made my day too!!!).  So I immediately had the package picked up, and while I was chatting with some friends over at our playground, the package came.

I know I was probably a blabbering fool at the chat–I was so excited!!! I don’t even remember what I said; I just know it involved a lot of woohoo’s and jumping up and down and running around in circles and dancing like crazy. 😆

A little aside: when I got the box, it had been opened. And hastily put back together again. See, that’s the thing I don’t get about the post office in this country. Why do they do that? Doesn’t that constitute some deprivation of one’s right to privacy? (Not that there was anything private in there, but it IS nice to be the one who tears open the tape of your own package instead of having someone get there and do it before you.  And my friend Kari did such a great job of putting the box and the gift inside together so nicely… 😦 ) I suspect they open it because they want to check if there are $$ inside the package. After all, if it were to check the safety of what’s inside, there are Xray machines to do that, right? hmmmm. Very strange, Watson, very strange.

Here’s what it looked like when I got it:

The Best Surprise of the Year

BUTTTT!!! Even so, that didn’t dampen my excitement!

And here’s where it gets even MORE exciting!!! I opened the box and discovered a Christmas card from Kari 8) , and another card with a note, a long note, on it! WOOHOO BIG TIME!!! 😀

I love receiving letters!!! 😀

And wait. It gets even better. As I was happily freaking about the package with my girlfriends on the chat, it dawned on me that they knew about the package and its contents! Apparently they were all in on it, they all had something to do with getting the package to me… now how TERRIFICALLY COOL is that???? I looooooove my girlfriends at the playground, they are soooo sweet! Now THAT is what totally touched my heart!!! I have seen this book through the making but to have the real thing in my hands: wow. And to know that it got to me flying over the oceans on the wings of my sweet girlfriends’ love… that’s an infinitely bigger WOW!!!

I guess here is where I have to explain why this book is so special: this is a book that we, rockers at Jessica’s playground, came up with as a surprise for Jes (if you look at her blog and scroll to the end of December, you’ll find photos there of the same book). It was a collaborative effort of all the wonderful girls on our playground. Laurie came up with the idea seed, Kari pushed and pulled and took over the reigns (Kari’s da boss! 😆 ), Tori came up with the mosaic cover, and I came up with the dedication page and the two final pages at the end of the book. Every wonderful girlfriend on the book contributed her own masterpiece (without their pages, the book would be nothing) AND contributed time, effort, even finances, to get this book off the Shutterfly site and into Jessica’s hands! WOW! This is working together at its very best!

I guess I also have to explain that I could not, for one reason or another, upload any of my page files to Shutterfly (thank you Veevs and Project Posse for doing the uploading for me; where would I be without you?) So that meant that I also would not be able to order my own copy of the book! So that is why I am just sooooo awed by the book in my hands today. I can stare at it all day long, know what I mean? Rub my eyes, stare. Shake my head in quiet pleasure. Repeat: rub my eyes, stare…

😀

Kari, you are amazing. Thank you, my dear friend, for organizing this whole thing!!! (Even if you did it behind my back. hahaha!!!) Tori and Laurie, you too! PP rocks! And everyone on my playground, THANK YOU!

I feel totally privileged, honored, and blessed to count ALL MY GIRLFRIENDS on our playground among my dearest, dearest friends. Actually, no, they’re more than just girlfriends and best friends. They’re SISTAHS in every sense of the word and more! (My ties of affection to you are so strong that they can build a bridge across the oceans and we won’t even need visas to visit each other! Ha!)

There are no words that can accurately express or even come close to my gratitude and overflowing affection for you, my sweeties, so here’s a “card” I made (they say a picture paints a thousand words… so here are my thousand words, and more–uh… keep your eyes on my message more than on my funny face, okay? 😆 )

Me and the Surprise

Thank you. Seriously. For making this the best day of the year ever. I can’t say it enough.

Oh and PS? My son will attest to the fact that since I got the book and the card, I have not let it out of my sight and reach for a single minute. WOOHOO!!! 😀

Oh, and of course, I had to take photos of the masterpiece that Jessica’s rockin’ girls put together for her, right? 😀 (And kari’s lovely handmade card too!)

Jes’ Book

And here’s my friend who put it all together:

Kari’s Page

I wish I could put the photos of all the pages of my darling friends’ pages over here… but that would mean that I would be putting the ENTIRE book on my blog! 🙂

Girls… I love ya! You know I do!

Almost Caught Up

Almost. Not quite, but I’m getting there.

Did three layouts yesterday in an attempt to get caught up with the LOAD requirements I had failed to post on time. I’m not giving up the goal though… I’m still working towards finishing 31 layouts by the 31st of January.

Here are the three I did:

10 More

Journaling reads:

wheeeee! only ten more days till christmas!!!

CREDITS:

Jessica’s fab DD template, Michelle Coleman’s topper, Katie Pertiet’s grid brush AND Papers by Leora Sanford, Lisa Warren, and Heidi Larsen(slightly recolored); Emily Merritt’s button; Christina Renee’s doodled circles overlay
Brrrrr…

Journaling reads:

brrrr… ….break out the blankets and the jackets! we may live by the equator but that doesn’t stop jack frost from nipping at our noses and toesies!

CREDITS:

Jessica’s fab Daily December template; Michelle Coleman’s Topper; Katie Pertiet’s Grid Brush AND Angela Shetzer’s papers &, holly stamp from her Downhome Christmas kit; John’s Photoblast EZActions

Little Santa

Journaling reads:

more than the games, more than the chance to have your photo taken with santa, more than the yummy food laid out on the tables, what you loved most of all was giving your classmates christmas gifts. so wonderfully generous. so typically you.

CREDITS:

Jessica’s fab Daily December template; Michelle Coleman’s Topper; Katie Pertiet’s Grid Brush & doodled Christmas title AND Michelle Coleman’s MerryLittleXmas papers; MiriamLima’s flower; EvaKipler’s Artistic-Flourish sequins; Anna Aspnes’ quote; ScrappyPony’s Holiday Grunge Overlay

Balancing in White

Our lesson at 2peas for this week had to do with White Balance. Which is a big word for just making sure that your photos’ colors are “calibrated” according to the light source that you’re shooting in. So if you’re shooting indoors with incandescent lighting, you can get a better-looking photo by tinkering around with your camera’s WB, instead of coming up with a photo that looks like everyone ate much too much mangoes and papayas and therefore turned orange. 😆

Our challenge for this week was to take 3 or more indoor photos: one using the automatic white balance setting of the camera, one with the “tungsten” setting (or its equivalent), and another with White Balance set manually.

There were bonus points for trying out the different settings for white balance. WB settings vary from camera to camera. On my D40 I have an entire list: Auto, Incandescent, Fluorescent, Direct Sunlight, Cloudy, Shade, and Manuel. I tried them all with exactly the same item and without fiddling around with the fine-tuning knob (According to ken rockwell, this is something unique to Nikon, which Canon doesn’t have: the white balance settings on Nikon allow us to further refine the white balance settings, even if they’re “set,” so that we can come up with the best possible color calibration when we take a photo).

Here are the results of the experiment:

{ Click on images for larger views}

WB Auto Incandescent

Incandescent WB setting looks a little greenish, don’t you think?

WB Shade & Direct Sunlight

I think the Shade setting looks too orange… Ken Rockwell says that this setting is best for shooting in the shade, which produces colors which are normally bluish (hence the orange balances the blue). It also works, he says, for shooting on cloudy days when light from the clouds casts a bluish tint, or when you have a subject that’s backlit. Nice to know, right? 😉

WB Cloudy & Fluorescent

Cloudy WB casts a warm tone and is better, Ken says, for outdoor shots in direct sunlight. The fluorescent WB setting I know I do not like. 😛

Manual White Balance

CREDITS: Jason Gaylor’s brushes, Papers by Petit Moineux

I find that when I set white balance manually, it was closest to the auto setting, which brings me to something that I learned:

Nikon’s Auto White Balance totally rocks. 😀 I think I’ll keep my white balance setting on Auto, though it’s terrific knowing how to manipulate the different manual settings, just in case I find myself in a situation that requires it.

Alright! All for now! Must get working on the next freebie for you, my sweeties!

Catch you later! 😉

Full speed ahead!

Alright, this has been a very busy couple of days lately! But fun!!!

The very first course-for-the-year-2008, Now We’re Rockin’ with Photoshop, has just started its second run over at our playground, and I’m so excited to be part of the journey of the new (and not so new) students! I inevitably end up spending most of my time skipping around the class forum and the gallery, and of course there’s the regular main forum where we all hang out and the main PSF gallery where we hang our layouts 😆 Love the buzz and natural high that Jessica’s courses always create! 🙂

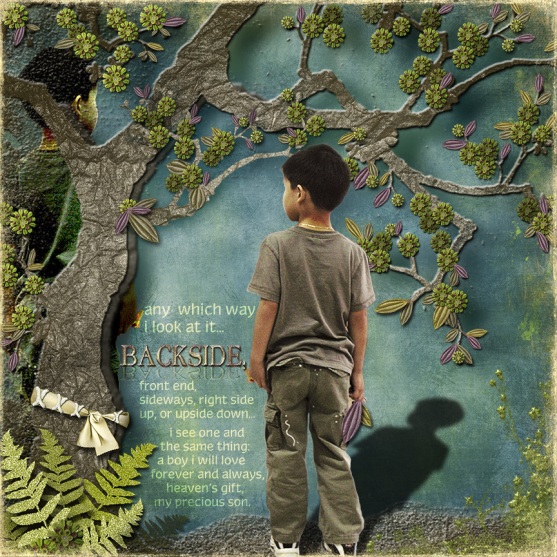
I completed my layout for the Oscraps Designer Spotlight Challenge featuring Annie Manning / Paint the Moon. It was a lot of fun, even if I did spend an entire day working on my layout (one day before the deadline for uploading, so it was a do-or-die situation again for me! 😆 ). It was totally an experiment and a wild thing I just thought of in my mind (with a bit of a prompt from my son, who suggested that I use a shadow for the multiple-photo requirement). And because I had never done any layout like this before, never dreamed I’d ever make a layout like this, it was totally playtime for me! I ended up with more than 140 layers (i kid you not! Though I did merge them in the end, when I was done), and just as many layers of smiles on my face when dh told me it was his favorite layout.

Here’s what I made (this counts as my LOAD for Day 19!)

Backside - Oscraps challenge Jan08

Journaling reads:

any which way i look at it… BACKSIDE, front end, sideways, right side up, or upside down,,, i see one and the same thing: a boy i will love forever and always, heaven’s gift, my precious son.

CREDITS:

All items from Annie Manning’s Nature’s Glow kit, plus Michelle Coleman’s Glow overlay & paper, Sara Carling’s treelove paper, Jason Gaylor’s brush, and atomic cupcake.

Thank you to all my darling friends on the playground (and on Oscraps too!) who left such kind comments. And Annie, thank you!, your comments totally made my day too! 😀

LOADDDDDDD Updates

I missed posting my latest Daily December layouts (which were my LOAD for Days 18 and 20). I have yet to make my LOAD #21 and 22. Phew! Gotta be working fast now! 😉

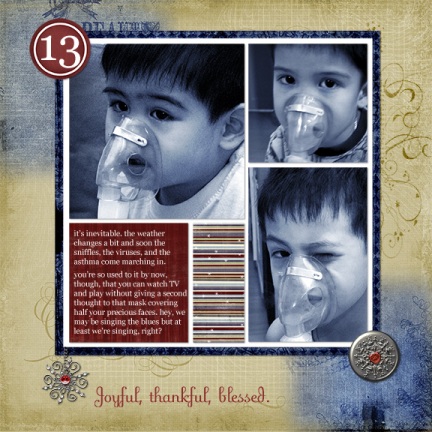
Here was LOAD Day 18 (which was also Daily December No. 13)

Singin’ the Blues

Journaling reads:

it’s inevitable. the weather changes a bit and soon the sniffles, the viruses, and the asthma come marching in.

you’re so used to it by now, though, that you can watch TV and play without giving a second thought to that mask covering half your precious faces. hey, we may be singing the blues, but at least we’re singing, right?

CREDITS: Jessica’s fab Daily December template, Katie Pertiet’s grid frame, Michelle Coleman’s topper  and Winter Wonderland papers, beaded and jeweled snowflakes, and charm jewels. Also: Emily Merritt’s paper, my own gemstone, and John’s Photoblast EZaction used on the photos.

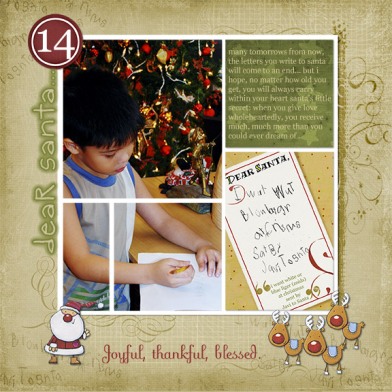
And now here is the LOAD I made for Day 20:

Santa’s Secret Message

Journaling reads:

many tomorrows from now, the letters you write to santa will come to an end… but i hope, no matter how old you get, you will always carry within your heart santa’s little secret: when you give love wholeheartedly, you receive much, much more than you could ever dream of.

CREDITS:

Jessica’s fab DD template, Michelle Coleman’s topper & paper, Katie Pertiet’s grid frame and quotes, Papers by Lisa Warren and Misty Mareda, atomic cupcake, and elisabethmey for the super-cute christmas hero freebies.

I’m running out of Daily December ideas! 😆

Delayed but not Delinquent! 😉

So I took longer to put up the last set in the Pasteleria series. Parting is such sweet sorrow… I hate to see this kit end, but am excited to explore making the next freebie kit for you, my sweeties!

{ Click on image for larger view }

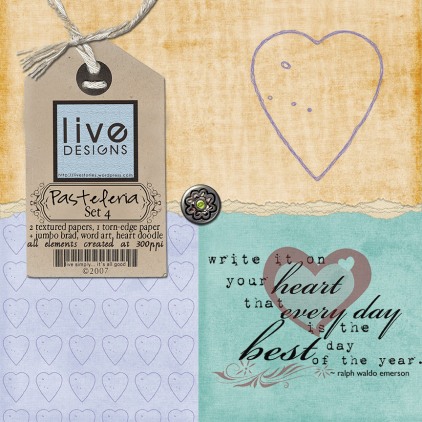
Pasteleria Set 4 Preview

Here’s what comes with this set: Teal Garden is a textured solid paper; Baby’s Breath-Love is a pastel blue paper with lavender heart doodles that I made; and SoftSun-Torn Edge is a 12×12 textured orange paper with a torn edge (if you want to use it as a photo mat or a journaling space, feel free to resize it 😉 )

The jumbo brad that I promised would come is now here! (Preview shows its “actual” size in relation to the layout size above). You can easily resize it to make it a smaller brad too.

There’s a heart doodle that you can use as a frame, as an accent, as a journaling block… And then, at the last minute, I decided to create WordArt to go with the kit as well. The quote is by ralph waldo emerson.

Hope you like this last set too!

Here’s where you click to get the last set of Pasteleria!

Alrighty then… I would want to sit a while longer with you, my sweeties, but it is almost 4AM again in my part of the world, and I need to get some rest so that I can catch up with 2 LOADS by tomorrow!

As the ever-playful, bouncy Tigger says: Tata for now!!!

PS. Angela, I’ll post tomorrow or the next day about the Lasik experience 😉 I hope your son’s surgery was a huge success!

Here we go…

… Set 3 of Pasteleria! 😀

w-livedesigns-pasteleria-3.jpg

I know I said I’d just have dinner, and no, I do not spend three hours eating dinner, but when I was about to zip up the third set, I looked at the journal block and thought it would be nice if it came with a clip that you could use to digitally attach it to your layout if you wanted to. Sooo, to make a long story short, I came up with the clip.

And then I thought, hmmm. That clip needs something to attach it to the layout with… so I came up with a brad! But the brad will come tomorrow, with the next–and last set–of this freebie. (Not the last freeb, just the last set in this series. 😀 )

So here’s what you’re getting in this set: 3 textured papers – Limelight and Lullaby, in their solid, lightly grunged-up versions (so you have the option of using solid papers with the rest of the kit) and Caress, which is a very subtly patterned paper. There’s also a chipboard journal block and the metal clip that I mentioned earlier. (Credits for the wonderful designers whose commercial use items I used are in my TOU).

Here’s where you go to download Set 3!

Alright, won’t stay long now as it’s again early morn (that would mean dawn) and i still have no LOAD for Day 18. Gotta work on that.

Soooo, goodnight sweeties, and I’ll be back tomorrow!!!

PS. Thank you sooooo much for your sweet, warm, kind comments. They totally totally make my heart dance with joy. Love ya all who take the time to leave love! ((((((((hugs)))))))) to you!

In Love with Cameran

For those who are wondering who Cameran is, that would be my camera (camera + Nikon = Cameran 😆 )

I am totally loving the manual mode now (though I think I’ll shift back to the aperture priority mode for regular daily shots. Just nice to know that I can tweak the way my camera works according to the effect I want to get). Am totally loving the tripod that hubby so generously bequeathed to me, too! (Am I blessed having him or am I blessed having him? 😀 )

So I played around with Part 2 of Week 2’s lesson of the 2peas Photography course. If you’ve been reading the past posts, the 1st week had to do with aperture (lens opening) priority, and this week had to do with shutter speed. Part 2 (you get to advance if you’re a diligent student, 😆 ) is setting the camera to Manual mode (why is this such a dreaded setting, I wonder?) and applying what you know about ISO, aperture, and shutter speed to tweak your shooting according to what you want to come up with.

We were actually supposed to choose one priority to tweak in the manual mode: either aperture or shutter speed (because once you set your ISO and one of the two other items, then the camera will adjust the 3rd item for you. Nice, right? 😉 )

I decided I wanted to try both! So I played.

Here are my shots in manual mode with the following settings: f/4.5 ~ focal length: 52mm ~ ISO: 800

{Click on images for larger views}

Manual Mode with Aperture set at f/4.5, focused on book in front:

Manual with Aperture Priority, Front Focus

Manual Mode with Aperture set at f/4.5, focused on books at the back:

Manual Mode with Aperture at f/4.5, Back Focused

Note: I’ve recently begun my goodreads (didn’t really get much up, unless you count my setting up an account and one book review, hahaha!) so I wanted a shot that I could use for my profile photo over there. I took 2 shots: in the first, I focused on the front part; in the second I focused on the back part. (In the second photo you can catch a sneak preview of the books that will appear on my to-read list. Come to think of it, these same ones will be featured in my to-cover-with-plastic-first list. 😆 )

Here is my one and only shot taken in manual mode, prioritizing shutter speed.

Shutter Speed at 6 seconds.

Shutter Speed Set at 6sec

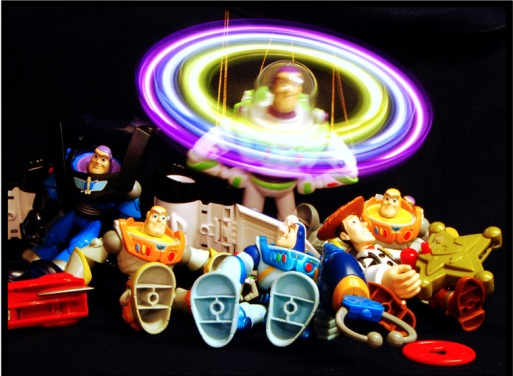
I set the shutter speed at 6 seconds with the same ISO of 800 and a 32mm focal length. I used a tripod because of the ultra-low speed I wanted. (Had I held it in my hands, simply breathing out of my nose would have blurred everything in my photo. hahaha!) I placed it at a very slow speed because I wanted to blur the lights coming from Buzz Lightyear.

Considering that it took soooo long to set up and just a few seconds to take the shot, I was pretty pleased with the results (if I may say so ever so humbly). It was so funny because I had to tie Buzz Lightyear’s legs together with rubber band to keep the on-button activated. Then I had to figure out how to make Buzz stand on his legs at an angle (had to tie him with gold cords, which you’ll see in the background behind him) so that I could get the full effect of the lights. Of course all the other Buzzes and Woody and Zorb had to lean or sit at varying angles just so Buzz the LIGHTyear guy could really light up the place.

This is soooo fun! Play along with me, why don’t you? Then link me up to your photos so I can ooh and aah at them too! 😉

LOAD Day 17

Okay, I missed upload cutoff time by 2 seconds again. I’ve got to stop playing long enough to upload way before the last minute, don’t you think? 😆

So here’s my 17th layout for January and my 12th Daily December layout. Woohoo!!! In 14 days I’ll have a theme album completed, all thanks to LOAD’s kick in my butt! Thank you, Laine!!!

Gingerbread Gone

Journaling reads:

five minutes tops. and then they were gone. those gingerbread boys never stood a chance with you, my dear hungry boys.

CREDITS:

Jessica’s fab Daily December template, Katie Pertiet’s grid frame, Michelle Coleman’s topper, Emily Merritt’s and Heidi Larsen’s papers, Karel’s gingerbread bowl, Anna Aspnes’ ribbon (recolored), and Bren Taylor-Boone’s alpha.

Reality TV, anyone?

Did any one of you catch American Idol yesterday?

We had a ball of a time watching Reynaldo Lapuz. What a guy! He happens to be Filipino. Actually, from the very first moment when dh, my kids and I caught the teaser of the show on TV, we KNEW that this guy happened to be Filipino. We were rolling on the floor with laughter. What a great guy. How can anyone help not liking him, simple as he is?

Paula, too, cracked us up with her interpretative hand signals and her bopping along. Amazing.

Dh checked Youtube minutes after the show ended and, true enough, there he was! on Youtube. Within minutes! So funny.

Here, in case you missed it. (And if you didn’t, watch it again. It gets better each time).

What were your favorite parts? These were mine:

“Simon, you are a great person. (sniffle, sniffle, voice breaking, tears threatening to fall) You give chance to everyone to sing to the whole world. I’m thank you.”

“You are heaven’s chosen to give chance to any talent for free of charge!”

“Even they throw you negative words but there are many people who really like you, who really admire you. One of them is meeeeh. You are a great person, Sssssaaaahmon.”

“You’re my glory, Ssssssssaaaahmon.”

Seriously, though, laughter aside, you know what I really, really like about this guy? (Aside from the fact that he’s sooo Pinoy!) He is just so guileless, so good-natured, so happy. So Filipino, actually.

You know that part where Simon tells him no? He just goes and hugs Simon. I mean, how gooooood can a person’s heart be? Whereas 90-95% would walk out and say bad words and curse, here’s this guy, just so thankful and so appreciative of the chance to sing. Amazing.

On a deeper level, I guess it teaches us how to be grateful. In a world where we often forget that it’s the simplest things that matter.

Like I said, what a guy, huh?

(And mark my words, this guy is going to be a greater hit than William Hung ever was. 😆 )

Here’s another Pinay (slang for Filipina… for men the equivalent is Pinoy) who made it big on Ellen Degeneres’ show. What’s funny about it is that it shocks people that she has a good voice. Wasn’t shocked that she could sing well, actually, because there are tons of people in my homeland who can sing well (and there are tons who can’t either. But Filipinos in general love entertainment and performing). People on the street sing well. The man in the bus can break out in song and he’ll be in tune. Let a band play on the streets, and passersby will bob their heads and move their bodies in perfect rhythm. I guess what shocked me more was that she was actually discovered on youtube, and Ellen was able to give to her an opportunity that Charice Pempengco probably never even dared to dream of.

Me? I am in awe of her, simply because she can do what I can’t. 🙂

You absolutely hafta, gotta take this GREAT TEST!!!

for photographers, Photoshoppers, and generally anyone addicted to digital stuff (that would be you, and me, and you, and you too, and you … 😆 )

The objective of the test, called Fake or Foto, is for you to determine which of the photos in a set of 10 is computer generated and which is an actual photograph. Try it. You’ll be amazed.

And what’s great about the test is you can be very visual about it if you’re feeling tired and just need some entertainment. Or, if you’re intense, you may want to summon everything you know about photography, lighting, shadows, effects, and Photoshop to help you get a higher score. Either way, it’s fun.

Find the Fake or Foto test here.

Click on the link, take the test, then come back and post in the comments what your score was. I’d love to know!!!

Alrighty. Need to have dinner and then I’ll be back in a bit to post the link for Set 3 of Pasteleria.

Catch you later, alligator! 😉

Yawning away…

but just wanted to share with you the second set (out of four) of Pasteleria!

{Click on image for larger view}

LivEdesigns Pasteleria Set 2

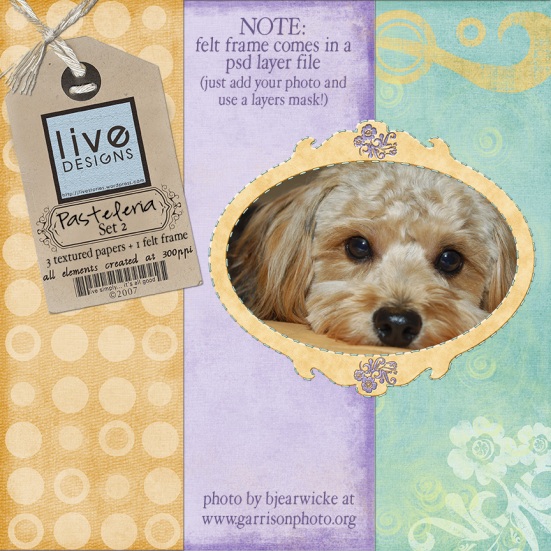
Here’s what you’ll be downloading (if you wish to!  😉 ) Soft Sun is a patterned orange paper; Caress is a solid lavender paper; and Teal Garden is the teal patterned paper you see on the right of the preview. (Credits for some commercial use items I used to make these freebies are in the TOU.) You’ll also be getting the stitched felt oval frame with embroidered flowers (not the adorable little puppy, which is a free stock photo taken by bjearwicke. My friend Jackie would approve of the preview photo… 😉 ).

I thought it would be much easier to put a photo in the frame if I included a layer mask for it, so what you’ll be getting is a psd layered file . Just put your photo in a layer between the frame and the mask, and do a CTRL-G (CTRL-ALT-G for full version Photoshop), resize to fit the frame,  and voila! (I’m assuming everyone who downloads is using a psd-compatible software program. If there’s anyone who needs a simple PNG file, drop me a line in the comments and I’ll send you the png file  (the frame alone, without the photo mask).

Here’s where you go to get the freebie.

Missed LOAD cut-off! C’est la vie!

I missed the LOAD cut-off for Day 16 by 6 measly minutes, but that’s okay. That doesn’t stop me from attempting to create 31 layouts by the end of this month.

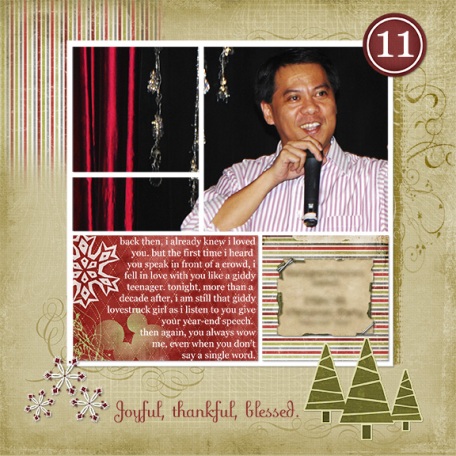
Here’s my LOAD Day 16 layout, (Don’t) Say a Single Word.

Daily December 11, LOAD Day 16

If you think your eyes are getting blurry when you try to read the tag on the right side, you can be assured that you don’t need glasses. Sorry… I had to blur the personal information over there.  😕

CREDITS:

Jessica Sprague’s fab Daily December template; Katie Pertiet’s grid frame; Michelle Coleman’s topper and sparkle flake; and Misty Mareda’s staples. Papers are by Michelle Coleman, Jackie Eckles, and Lori Barnhurst. Used an atomic cupcake action.

Wee Willie Winkie

is calling me to bed! Gotta go. I need to be up in exactly 3 hours as I’ve got a meeting to attend. Can’t be late, can’t be late, can’t be late (as the Mad Hatter would say).

(((((((hugs)))))) my sweeties!

PS. The next set of Pasteleria should be up tomorrow (or today… since tomorrow is today 😆 ) so do come visit soon!

London Calling…

Interrupting freebie work and LOAD scrapping to post a few photos for my friend, Verona, who has a collection of Diana the Princess stuff. And for my friend Veevs, who continues to deny that she’s undercover British royalty (from the Peruvian branch of it). 😆

Dh and I happened to be in London around the time that the accident happened… give or take a few days, can’t remember now. We didn’t time it that way; we just happened to be there. I may not remember the exact number of days but I do remember the cab we were riding in from the airport stopped when we passed by the Buckingham Palace (as a sign of respect and sympathy). I also remember the tons and tons and tons of flowers left by everyone who happened to pass by.

I guess I must admit (geez, and I thought I could keep this hidden from my 7 random facts tag) that when I was in grade school, two of my friends and I were very much up-to-date with the goings-on in the British royal family’s lives. We knew who was related to whom, and where they had castle residences. Funny, because the interest had its roots in a simple fooling around with the British accent. “Oh, what a quaint idea, deahhh” we would say to tease each other. Silly stuff like that.

Anyway. I know nothing much about the royal family anymore. Can’t remember much either. So don’t go asking me any trivia questions because I will most certainly fail your test. 😆

Verona and Veevs, these are for you! (Will remove these photos once you’ve seen them so that I don’t make you suffer by plastering my face all  over my blog. 😆 )

London, September 97

London, September 97

Diana and Me… hehehe

Alright then. Enough fooling around. Freebs and LOAD will have to wait till tomorrow as it’s 4AM.

Bed, not London, is calling.

😆

Photography Phun!

Yeah, that’s what Laine’s 12-Week Photography course at 2peas has been! Totally fun!

We’re into our 2nd week, and the lesson for this week is even more fun than it was last week! I guess I have to admit that while I am far from being a great photographer, I’m not a newbie at it either… but I’ve never participated in any photography course, ever, so this kind of learning-road is pretty new to me (adventure, yeah! the word for the month), and I’m having a load of fun with it! I love that there’s always a challenge with an exercise to do (must be echoes of the school-age kid in me 😀 ).

This week is all about shutter priority (and then getting to love the manual mode on your camera).

The challenge for this week was to take a photo of water from your kitchen sink flowing at a slow shutter speed and then at a high shutter speed. The idea is to see how a higher shutter speed freezes movement–sort of like we used to do when we were kids and we played “statue-dancing” (you know, where you dance like crazy and then freeze when the music stops. All those who move get taken out of the running. Bless the poor child who just has to sneeze at that point! 😆 ).

So to create that splashing of water, we had to have some object of our choice that would get in the way of the flowing water, enough for the water to splash about. I used an overturned carafe and, for some excitement and color (because my kitchen happens to be almost all black granite and stainless steel… very nice but very boring for photos 🙂 ), I added some glass pebbles. And I used my tripod (because if you take at a slow shutter speed and you move slightly, you’re going to get a lot of blurring… so even if my lens is VR-equipped, I didn’t want to take any chances. haha).

I got soooo excited with the challenge that I… uhm… didn’t read the instructions too well. 😳 We were supposed to set our ISO between 1000 and 1600, and I foolishly just shot away at the ISO my camera was set at when I last took a photo (400. Waaaay below the required minimum. Geez.)

One more proof that I make a bad student: we were supposed to take 1 photo at a slow shutter speed and then 1 photo at a high shutter speed, right. 1 + 1 = 2. I took three photos at different shutter speeds. Hmmmm. Maybe my school-age kids shouldn’t ever see my blog lest they get any ideas about not following Teacher to the letter. 😆

So here’s what I came up with:

{ Click on the images to get a clearer, amazing view of the differences! 😉 )

Lookie here!

Journaling below:

Water drops change: from an indistinguishable blur to “comet-like” drops with tails to distinct droplets floating in air. Wow!

Here’s another view that will show you the differences, even more amazing than the first one above. This shows you the difference in the water coming from the faucet:

Differences in Water Flow 2

And here are the individual photos:

With a shutter speed of 1/20 (this is the slowest shutter speed I used):

Shutter Speed 1/20

Shutter speed of 1/80 (this was the slowest speed that Laine had required at an ISO of 1000-1600):

Shutter Speed 1/80

Shutter speed of 1/200:

Shutter Speed of 1/200

Cool, huh? Try it and have fun!!!

My LOAD for Day 15

Yeah! Halfway through! Fifteen days into the new year with fifteen layouts to show for it!!! Woohoo!!! 8)

Santa’s Elves

Journaling reads:

you have got to be the most adorable santa’s elves i’ve ever seen in my entire life! how did i get to be so lucky?

CREDITS: Jessica’s fab DD template, Michelle Coleman’s topper, Katie Pertiet’s grid brush, Emily Merritt’s papers, Lisa Warren’s cardinal

Alright then! On to working on the next set of Pasteleria. I’ll be back in a few! 😉

Yippee!!! (First Freebie for 2008!)

Woohoo, turning cartwheels here! I finally have something to share with you, my sweeties!

I am both excited and a bit uncertain about this kit that I’m doing, because it’s a bit of a departure from the colors I normally play with.

I have to admit: I am not much of a pastel person. Way back in the 80s (yeah, that time of mullet hairstyles, eek!), there was this curious book that supposedly would tell you which colors best suited you, based on your skin color. Does anyone recall that?

They divided the fashion color palette into seasons: Winter, Spring, Summer, and Fall. If I remember right (caveat: I don’t always remember right 😆 ), the Winter color scheme was supposed to be best for those with very fair skin and blonde hair, blue eyes, that sort of thing; and the colors were icy blue, icy green, shimmery sorts of colors. I remember Winter because one of my sisters qualified as that. She was born with blonde hair, and she recalls worrying–when she was little–that she was adopted, because the rest of us were all born with dark brown hair… that is, until my brother was born 4 years after and he was blonde too. 😆

Oh… they’ve lost the blond and are now dark haired like the rest of us. Go figure. 😯

Anyway, I remember being a Fall, and that suited me just fine as I’ve always been partial to oranges, browns, beiges, creams, neutrals (except for that brief phase in university when I wore nothing but black and white… thankfully, that was brief. >teehee< ).

This whole off-tangent story of mine is meant to explain why I am not really a pastel person. I like seeing them; they look absolutely fresh and soft, but I don’t feel like I know them, know what I mean? (Okay, I’m strange: I’m talking like colors were people. 😀 )

Buuuuut. It’s nice to stretch one’s wings and discover new horizons. After all, my word for January is ADVENTURE. (Have you thought of your word for the month / year yet?) And this certainly qualifies as an adventure for me!

Let me know what you think about this freeb, please? (Be honest. But be nice. 😆 )

So here’s the first set of the first freebie for 2008! (ha! alliteration there!)

{Click on image for larger view}

LivEdesigns Pasteleria Set 1

I’ve called the set Pasteleria, which is Spanish for a bakeshop or a place where you get pastries and sweet stuff (pastel + sweet = pasteleria in my twisted little mind, hahaha!) You can snag Set 1 here!

What you’ll be downloading is three papers, all slightly textured: LimeLight has a scrolly thing on its corners, Baby’s Breath has scratchy wisps of white on its edges, and Lullaby has stars and a moon surrounding it. There’s also a ribbon with a heart charm, which you can resize as you wish. Thanks to atomic cupcake, CindyDoerksen, and scrapNtag for some commercial-use items I used to make this!

By the way, pastels were supposed to be Spring (on the 80s fashion palette). If I remember right. 😉

Thank you in advance for the love you leave and please do take the time to let me know what you think (so that I know if I should quit this pastel adventure and go a different route or not…  hahaha!)

And it’s back to the DDs, folks!

After a brief and very wonderful playtime spent making a layout that belongs in my generic album (which I call Viewpoint… I’ll try to get a photo of it and upload it here), I’m back to making Daily December layouts with Jessica’s fab template!

Here’s my Daily December No. 9 (“The Gift of Christmas”) and LOAD Day 14.

The Gift of Christmas (Daily December 9)

Journaling reads:

One night centuries ago, a Child was born, God’s most precious Gift to the world. Thirty-three years later, that Child would give His life so that we could share in His forever. I hope that this inspires you, my dearest son, to keep giving and sharing, especially with those who have less than you, whether you are 5 or 33 or 105 years old.

CREDITS:

Jessica Sprague’s fab Daily December template *You won’t believe how many people love this template!* plus Katie Pertiet’s grid brush, Michelle Coleman’s Topper & Christmas papers from her Merry Little Christmas kit (recolored);  Nancie Rowe Janitz’s stamps (from her contribution to the Stand Up & Scrap Mega Kit (recolored all to fit Christmas theme); Angela Barton’s postage stamp, also from her contribution to the Stand Up & Scrap Mega Kit; and the world embellie, I made using these items: Michelle Coleman’s painted heart, Shabby Miss Jenn’s knotted ribbon (recolored), and Lisa Warren’s mini globe (Lisa’s and SMJenn’s items were also from the SU&S mega kit). Also used John’s Photoblast actions on the the photo of the children below and the one of my son with his two friends. (John has the most fab, user-friendly actions; if you use Photoshop full version or Elements and you don’t have these yet, you should check them out here! 😀 )

I was so glad that the preschool that my son attends arranged a get-together last December with a large group of less privileged children, and in so doing, they were able to give my son and his schoolmates the opportunity to really know the joy of giving and sharing time, laughter, and gifts. This joy which comes from a spirit of generosity is one which I hope my son will always know, no matter how old he becomes.

Other stuff I’ve been up to

Have you signed up for the 12-Week Photography lesson at 2peas yet? It’s so much fun to play, whether you already know the basics or not. (ha! I love any excuse to play. My mental age is probably 7. 😆 )

This week’s lesson lets you play around with the shutter priority mode in your camera. If you’re using a point-and-shoot type of camera, the equivalent would be playing around with the different auto modes, sports setting plus whatever else you want to play around with to see the differences.

And it’s a two-part lesson (not supposed to peek at Part 2 without doing Part 1), how fun is that! 😀 If you haven’t checked out the 2peas course yet, do! It’s really fun. (And you’re welcome, Jeanne. Love ya).

I’m going to check the kitchen sink photos I took and, if they’re not too embarrassing, I’m going to be back in a bit to post them here!

More adventure stories later! (((hugs)))

Some funnies

Decided to take a break from my Daily December album pages and make a different kind of LOAD entry for today.

I had wanted to use this photo of the lighthouse I took last year while we were vacationing in KK. I have also been wanting to use a photo of my hubby in the yacht, simply because I love the look on his face: absolute contentment, totally relaxed, free! Precious. Wish the bay was closer to the city if only for this reason.

Got to get both of my “wants” onto a single layout with this. That makes me happy. 😀 Also, I realize that the number of LOs I make featuring my hubby pale in comparison to the amount of LOs that my kids star in… but aside from the fact that he’s one and they’re five (and that fact automatically ups the scale in their favor–imagine the proportion: 1 is to 5), I also have a hard time journaling on LOs for him because that part of me is very private, treasured, even sacred if I may say so… but for this one, funnily enough, the journaling spilled out all in one go, like it was just waiting for me to put it down in the letters of the alphabet. Guess it was really meant to be made, huh?

My Harbor

Journaling reads:

you are my harbor,

my lifeboat, my anchor,

my shelter in any storm.

you are my north star,

the wind in my sails,

my lighthouse, my safe shore.

you are my ocean of adventure,

my blue skies, my gentle waves.

you are my horizon

where heaven and earth meet

in a long, tight embrace.

you are my one, my only,

my forever, my always.

CREDITS:

Katie Pertiet’s frame; Anna Aspnes’ paper & mat (recolored); Eve Recinella’s photo prong & deco star; Amy Cheeseman’s rubon; Nancie Rowe Janitz’ canvas texture, atomic cupcake action used on title, and LivEdesigns ***hey that’s me!*** grunge overlay & compass

Somefin funny happened…

Today:

My 5-year-old J and I had just come home from school and I commented how I had a terrible headache. (Not sure if it was caused by the extra-bright glare of the sun or the sunglasses I wore to shield my eyes… all I know is that it certainly had something to do with my “new” eyes).

My son said to me, “Mom, you should go to the doctor maybe.”

I said, “Yeah. Maybe.”

He said, “Don’t worry, I’ll go with you.”

A pause.

Then: “Maybe I’ll just stay home and wait for you. I don’t like the prickin’ they do at the doctor.”

😆

Last Saturday:

Over dinner last Saturday, hubby and I were talking about having lunch the next day at the new restaurant we opened. My 2nd son, who loves all things food and who can whip up real yummy stuff in the kitchen from nothing, opened his eyes wide in excitement. He asked, “Oh! Are we all having lunch there tomorrow?”

Naughty parents that we are, we decided to tease him.

Hubby said, “No, not we. Just your mom and me.”

I said, “That’s right. We’re having a daaaaaate!”

My son grew quiet, then said to everyone at table, “Just one little second, may I be excused?” and left before any of us could answer. We could hear him moving around in his room, and then he came back with some money, which he gave to me.

I said, “What’s this?”

He said, “Uh, that’s the change for the pizza I ordered for my friends when they came over yesterday. That way you can give me the amount that I paid and you already have the change.” (I had asked him to pay for it first, and told him I would pay him back).

I said, “Oh. Okay. But you didn’t have to give it me right now. What do you need the money for right now?” and gave him that questioning look that parents give their kids when they know something more lies behind the surface.

He looked sheepishly at us, and said: “Table for one?”

😆

What he meant was that he would go to the restaurant and pay for his own dinner, since we weren’t taking him. 😆 That guy cracks me up. Of course hubby and I broke out in loud laughter and told him we were just teasing him. Just as he was teasing us with his “table for one” line. That was really funny to me.

Yeah. We are certified crazies in our home.

😆

Alrighty then! More work to do! Catch you later!

(((hugs)))

PS. Sssh. I’m trying not to remind you that you should be getting freebs soon, but that’s exactly what I’m about to work on! 😉